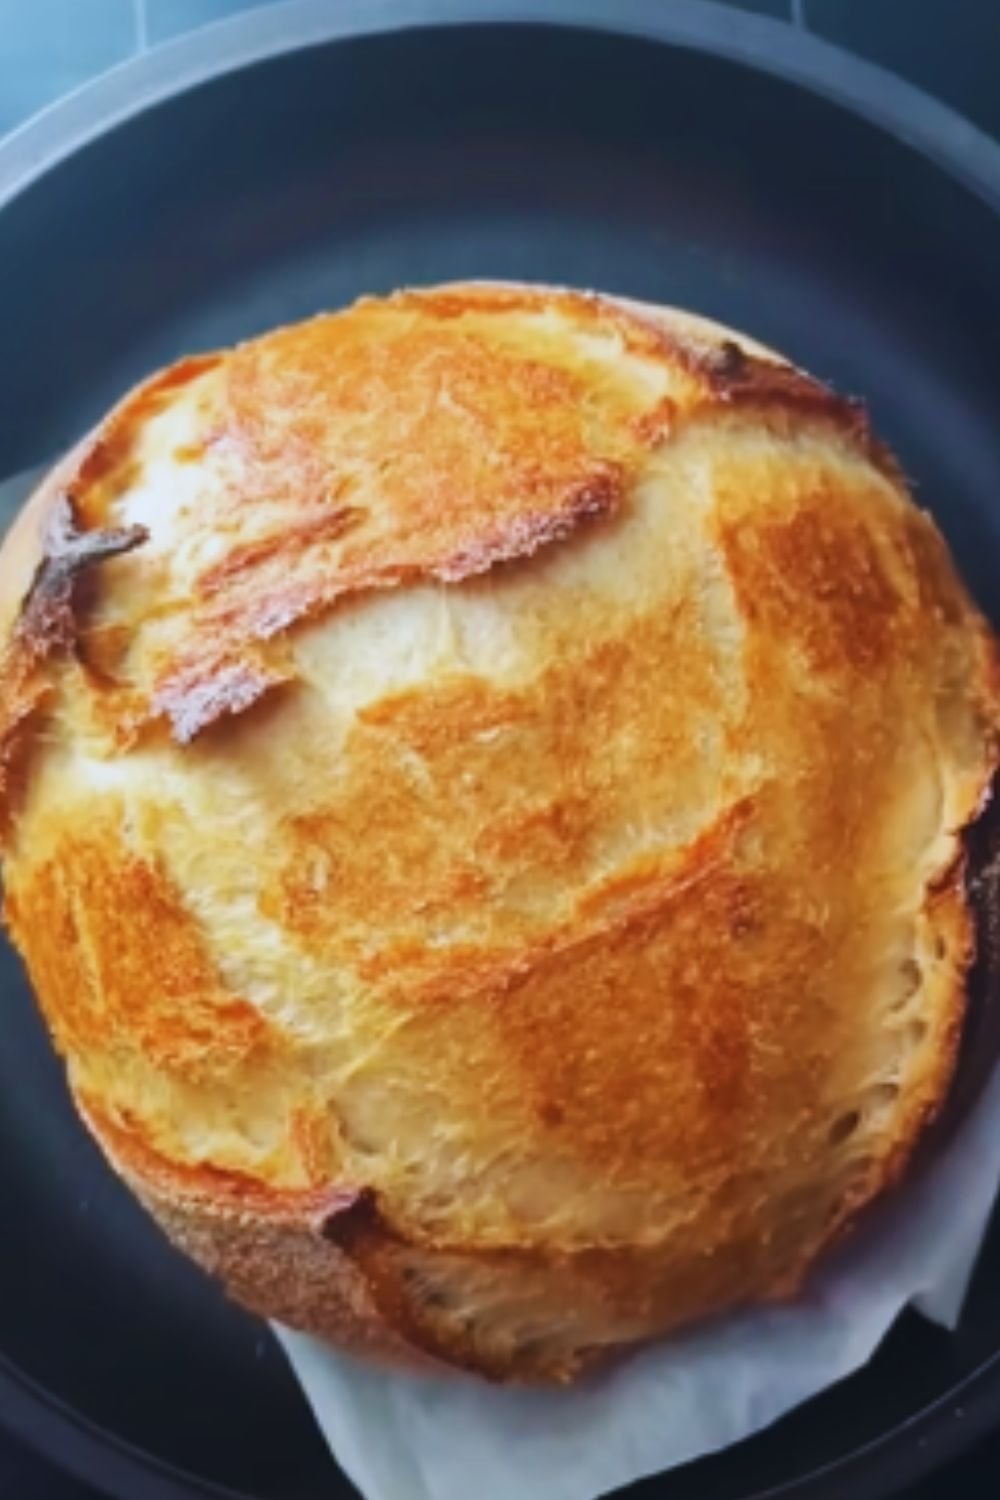
There’s something magical about the process of making sourdough bread. As I stand in my kitchen, watching my latest loaf emerge from the oven with its perfectly crackled crust and listening to it sing (yes, fresh bread actually makes a crackling sound!), I’m reminded of why I fell in love with sourdough baking. Today, I’m sharing my foolproof method for creating beautiful sourdough bread that will make you feel like a professional baker.
Understanding Sourdough Basics
Before we dive into the recipe, let’s understand what makes sourdough special. Unlike commercial yeasted breads, sourdough relies on wild yeast and beneficial bacteria that naturally occur in our environment. These microscopic organisms work together to create that distinctive tangy flavor and help develop the gluten that gives sourdough its characteristic chewy texture.
Essential Equipment You’ll Need
- Dutch oven (5-7 quart size)
- Kitchen scale
- Large mixing bowl
- Dough scraper
- Banneton or proofing basket
- Scoring lame or sharp knife
- Clean kitchen towels
- Spray bottle for water
Ingredients for Your Basic Sourdough Loaf
| Ingredient | Amount | Notes |
|---|---|---|
| Bread flour | 500g | 100% hydration |
| Water | 350g | Filtered, room temperature |
| Active sourdough starter | 100g | Fed within last 8 hours |
| Sea salt | 10g | Fine grain |
Creating Your Masterpiece
The Process Timeline
| Stage | Duration | Temperature |
|---|---|---|
| Autolyse | 30 minutes | Room temp (68-72°F) |
| Initial mix | 10 minutes | Room temp |
| Bulk fermentation | 4-6 hours | Room temp |
| Shaping | 15 minutes | Room temp |
| Final proof | 12-15 hours | 38-42°F (refrigerator) |
| Baking | 45 minutes | 450°F |
Step-by-Step Instructions
- The Autolyse Stage
- Mix flour and water until no dry spots remain
- Cover and rest for 30 minutes
- This step develops gluten and makes dough easier to handle
- Adding Starter and Salt
- Add active starter and dimple it into the dough
- Sprinkle salt evenly
- Mix thoroughly until well incorporated
- Cover and begin bulk fermentation
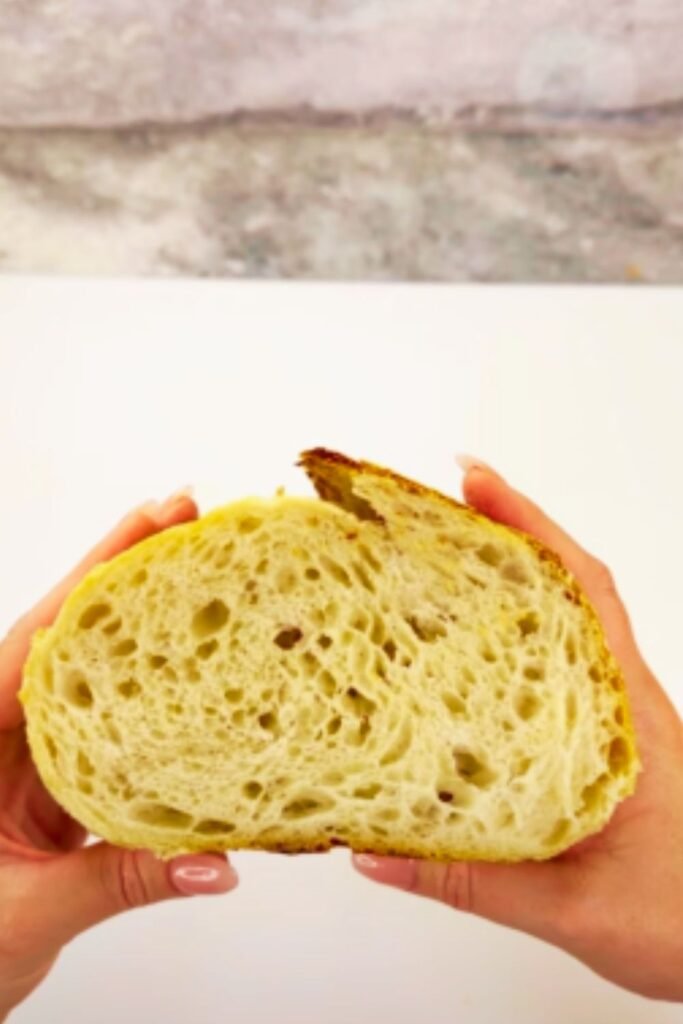
- Bulk Fermentation
- Perform 4 sets of stretch and folds
- Space each set 30 minutes apart
- Watch for these signs of proper fermentation:
- Dough becomes puffy
- Increases in volume by 50%
- Small bubbles visible on surface
- Feels light and airy when lifted
- Shaping Your Loaf
- Gently turn dough onto unfloured surface
- Perform basic shaping to create tension
- Rest for 15 minutes
- Final shape into tight boule
- Place in floured banneton seam side up
- Cold Proofing
- Cover banneton with plastic bag
- Refrigerate 12-15 hours
- Cold proof develops flavor and makes scoring easier
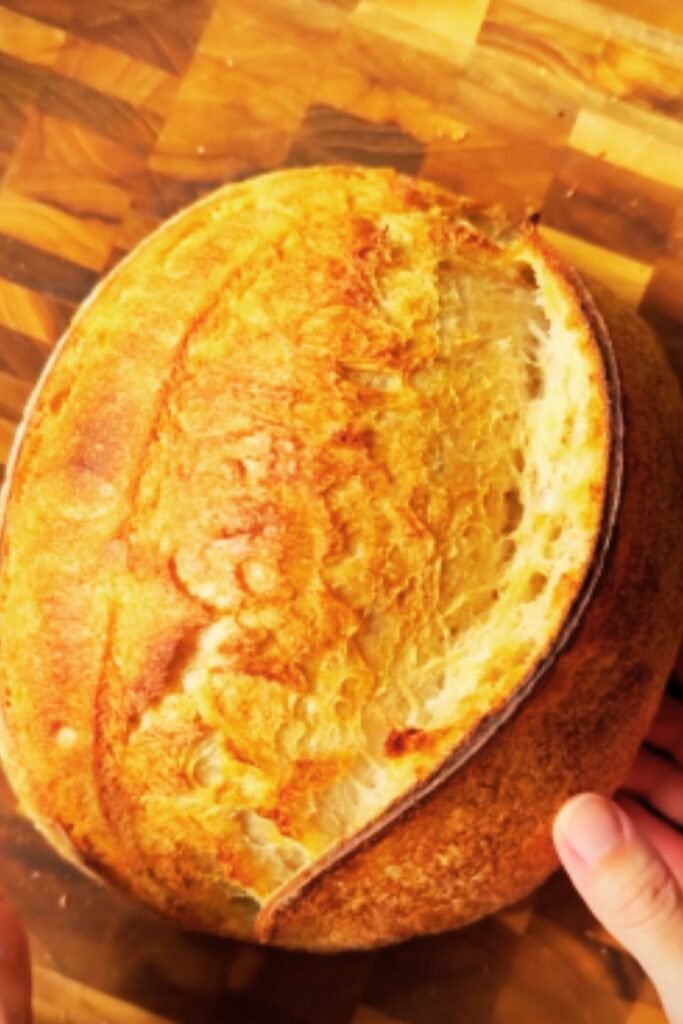
The Baking Process
- Preheating
- Place Dutch oven in oven
- Preheat to 450°F for 1 hour
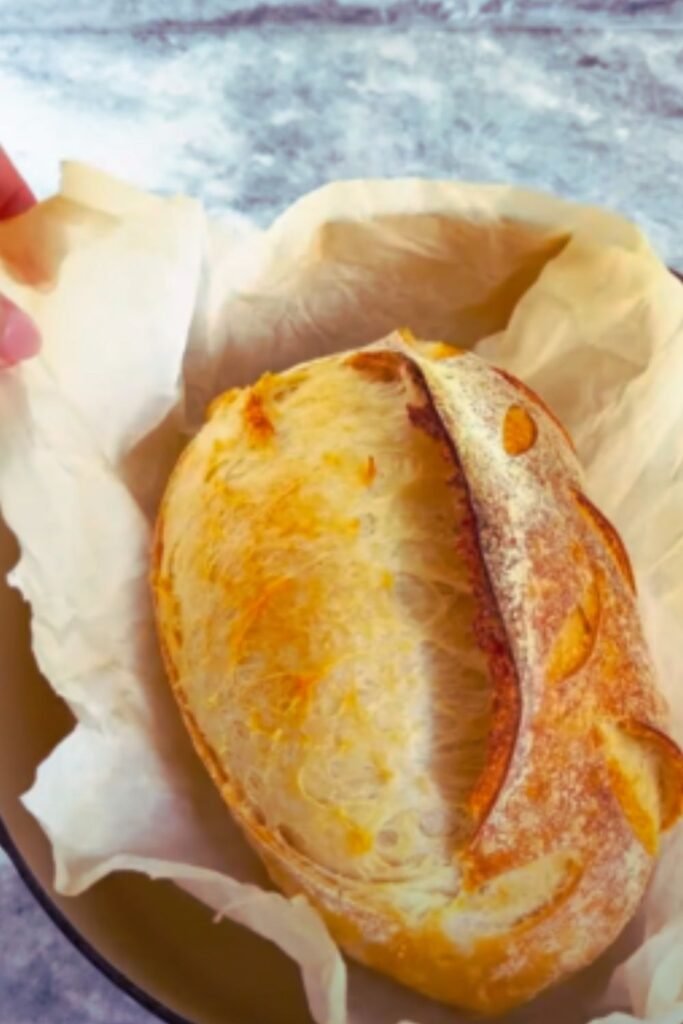
- Scoring and Loading
- Remove dough from refrigerator
- Turn onto parchment paper
- Score with confident cuts
- Transfer to hot Dutch oven
- Baking Schedule
- 20 minutes with lid on
- 25 minutes with lid off
- Internal temperature should reach 208°F
Troubleshooting Common Issues
Temperature Impact Table
| Environment Temperature | Bulk Fermentation | Final Proof | Notes |
|---|---|---|---|
| 65-68°F | 6-7 hours | 15-16 hours | Slower but more flavor |
| 68-72°F | 4-6 hours | 12-15 hours | Ideal range |
| 72-76°F | 3-4 hours | 10-12 hours | Watch carefully |
| Above 76°F | 2-3 hours | 8-10 hours | Risk of over-fermentation |
Storage and Serving Suggestions
- Allow bread to cool completely (at least 2 hours)
- Store in bread bag or wrapped in clean towel
- Best eaten within 4-5 days
- Toast older bread for amazing results
- Serve with:
- Fresh butter and honey
- Artisanal cheese
- Your favorite jam
- Avocado and eggs
- Olive oil and dukkah
Frequently Asked Questions
Q: Why didn’t my bread rise as much as expected?
A: This usually comes down to starter strength or fermentation time. Ensure your starter doubles within 4-8 hours before using it in your dough.
Q: Can I use all-purpose flour instead of bread flour?
A: Yes, but your bread might not rise as high. Bread flour’s higher protein content creates better structure.
Q: My dough feels too sticky to handle. What should I do?
A: Instead of adding flour, try working with wet hands and using a bench scraper. The dough will become less sticky as gluten develops.
Q: How do I know when bulk fermentation is complete?
A: Look for a 50% volume increase, dough that feels light and airy, and small bubbles on the surface. The dough should feel alive under your hands.
Q: My crust isn’t as crispy as I’d like. How can I improve it?
A: Ensure your Dutch oven is properly preheated and create steam by spraying water before closing the lid. The first 20 minutes with the lid on are crucial for crust development.
Variations to Try
Whole Wheat Blend
| Ingredient | Amount |
|---|---|
| Bread flour | 400g |
| Whole wheat flour | 100g |
| Water | 375g |
| Starter | 100g |
| Salt | 10g |
Seeded Sourdough
| Add-In | Amount |
|---|---|
| Sunflower seeds | 50g |
| Pumpkin seeds | 50g |
| Flax seeds | 25g |
| Sesame seeds | 25g |
Remember, sourdough bread making is as much art as science. Each loaf teaches you something new, and with practice, you’ll develop an intuition for the process. The most important ingredients are patience and attention to detail. Happy baking!

