
There’s something magical about the perfect blend of sweet and spicy flavors coming together in one dish. That’s exactly what you’ll experience with this irresistible sweet chili chicken recipe. I’ve been perfecting this recipe for years, and it never fails to impress my family and friends when I serve it at gatherings. The tender chicken pieces coated in that glossy, sticky sweet chili sauce create a mouthwatering dish that’s both comforting and exciting to eat.
Why You’ll Love This Sweet Chili Chicken
Before diving into the details, let me tell you why this recipe deserves a permanent spot in your dinner rotation:
- Perfect Balance: The harmonious blend of sweet, spicy, and savory elements creates a deeply satisfying flavor profile
- Versatile Dish: Works beautifully as a main course, appetizer, or even in wraps and salads
- Crowd-Pleaser: Appeals to both adventurous eaters and those with milder palates (you can easily adjust the spice level)
- Quick Cooking Time: From prep to table in under 30 minutes
- Simple Ingredients: Most items are pantry staples you likely already have on hand
The Secret Behind Perfect Sweet Chili Chicken
In my years of cooking, I’ve discovered that the key to exceptional sweet chili chicken lies in three critical factors: properly prepared chicken, a balanced sauce, and the right cooking technique.
When it comes to the chicken, I prefer using boneless, skinless chicken thighs. They remain juicy and tender even when subjected to high heat cooking methods, unlike chicken breast which can quickly dry out. However, if you’re watching your fat intake, chicken breast works well too – just be extra vigilant with cooking times.
For the sauce, commercial sweet chili sauce can work in a pinch, but nothing compares to a homemade version where you control every element of the flavor profile. I’ll share my tried-and-tested sauce recipe that delivers that perfect balance of sweetness, heat, and depth.
As for cooking technique, I’ve found that a two-step approach yields the best results: first searing the chicken pieces to develop a flavorful crust, then coating them in the sauce to create that irresistible sticky glaze.
Ingredients You’ll Need
For the Chicken:
- 2 pounds (900g) boneless, skinless chicken thighs, cut into 1-inch pieces
- 3 tablespoons cornstarch
- 1 teaspoon salt
- 1/2 teaspoon black pepper
- 2 tablespoons vegetable oil for frying
For the Sweet Chili Sauce:
- 1/2 cup rice vinegar
- 1/2 cup granulated sugar
- 1/4 cup water
- 3 tablespoons sriracha sauce (adjust to your heat preference)
- 4 cloves garlic, minced
- 1 tablespoon fresh ginger, grated
- 2 tablespoons soy sauce
- 1 tablespoon cornstarch mixed with 2 tablespoons cold water (slurry)
- 1-2 red chilies, finely chopped (optional for extra heat)
For Garnish:
- 4 green onions, thinly sliced
- 2 tablespoons fresh cilantro, chopped
- 1 tablespoon toasted sesame seeds
- Lime wedges for serving
Nutritional Information
| Nutrient | Amount per Serving |
|---|---|
| Calories | 385 |
| Protein | 32g |
| Carbohydrates | 28g |
| Fat | 18g |
| Fiber | 1g |
| Sugar | 20g |
| Sodium | 820mg |
| Vitamin C | 15% DV |
| Iron | 12% DV |
| Calcium | 4% DV |
Based on 4 servings. DV = Daily Value
Equipment Needed
I find having the right tools makes this recipe much easier to execute:
- Large non-stick skillet or wok
- Mixing bowls (various sizes)
- Measuring cups and spoons
- Sharp knife and cutting board
- Whisk
- Tongs for turning chicken
- Small bowl for cornstarch slurry
Step-by-Step Instructions
Preparing the Chicken
- Pat the chicken pieces dry with paper towels. This crucial step ensures proper browning.
- In a large bowl, combine the cornstarch, salt, and pepper.
- Add the chicken pieces to the bowl and toss until each piece is lightly coated with the cornstarch mixture.
- Let the chicken rest for 5-10 minutes while you prepare the sauce components.
Making the Sweet Chili Sauce
- In a medium saucepan, combine rice vinegar, sugar, water, sriracha, minced garlic, grated ginger, and soy sauce.
- Bring the mixture to a gentle simmer over medium heat, stirring occasionally.
- Once the sugar has completely dissolved, let the sauce simmer for about 5 minutes to allow the flavors to meld.
- Whisk the cornstarch slurry once more and then slowly pour it into the simmering sauce while stirring constantly.
- Continue to cook for another 2-3 minutes until the sauce thickens to a glossy consistency that coats the back of a spoon.
- Remove from heat and add the chopped chilies if using. Set aside.
Cooking the Chicken
- Heat the vegetable oil in a large non-stick skillet or wok over medium-high heat until shimmering.
- Add the chicken pieces in a single layer, working in batches if necessary to avoid overcrowding (overcrowding leads to steaming rather than browning).
- Cook for 3-4 minutes without disturbing, then flip each piece and cook for another 3-4 minutes until golden brown and cooked through (internal temperature should reach 165°F or 74°C).
- Remove any excess oil from the pan, then return all the chicken to the skillet if you cooked in batches.
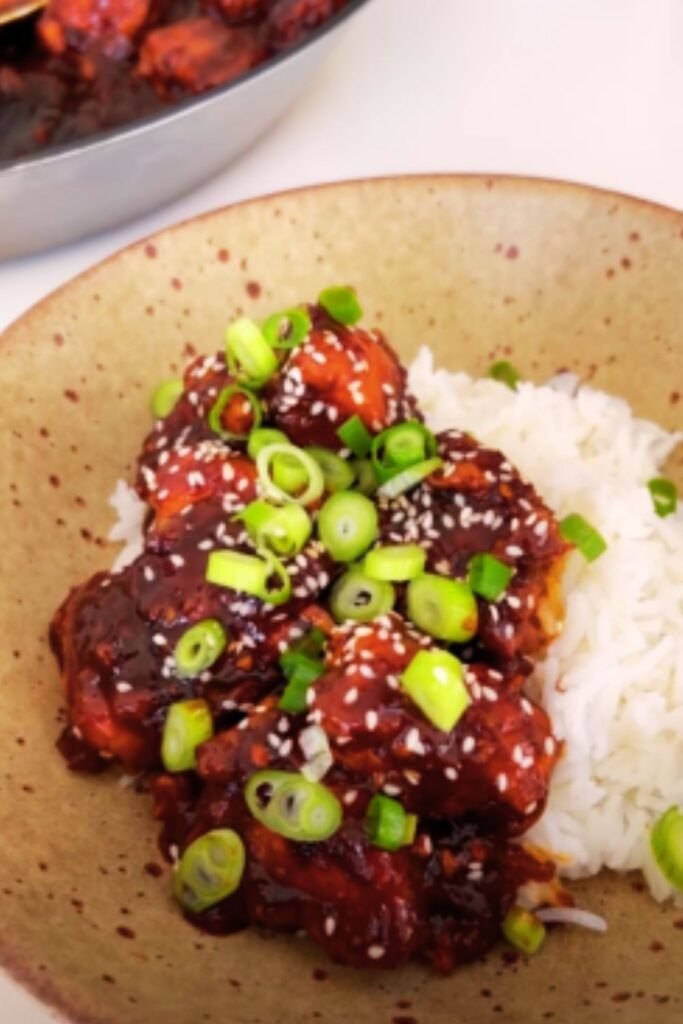
Bringing It All Together
- Pour about three-quarters of the prepared sweet chili sauce over the chicken in the skillet.
- Reduce heat to medium and toss to coat each piece thoroughly.
- Cook for another 1-2 minutes, stirring constantly, until the sauce has thickened further and forms a glossy coating on the chicken.
- If the sauce becomes too thick, add a tablespoon of water at a time to reach your desired consistency.
- Remove from heat and transfer to a serving dish.
- Drizzle the remaining sauce over the top.
- Garnish with sliced green onions, chopped cilantro, and toasted sesame seeds.
- Serve with lime wedges on the side.
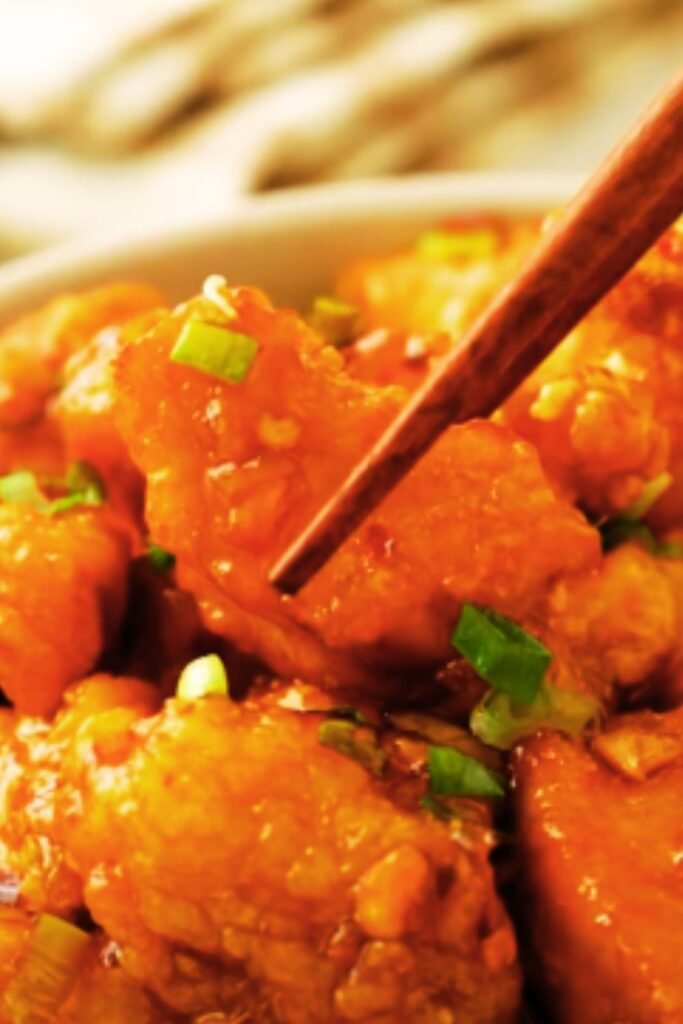
Visual Cues for Perfection
- The chicken should have a golden-brown exterior with a slight crisp from the cornstarch coating
- The sauce should coat the back of a spoon and appear glossy and translucent
- When tossed with the chicken, the sauce should adhere well to each piece, creating a sticky glaze rather than pooling at the bottom
Texture and Flavor Profile Analysis
What makes this sweet chili chicken truly exceptional is the interplay of textures and flavors:
Texture Breakdown:
- Exterior: Slightly crisp from the cornstarch coating and caramelization
- Interior: Tender and juicy
- Sauce: Sticky and glossy with a smooth consistency
Flavor Component Analysis:
- Sweet: From the sugar and natural sweetness of garlic
- Heat: Layered spiciness from sriracha and fresh chilies
- Savory: Umami notes from soy sauce
- Acidic: Brightness from rice vinegar and lime
- Aromatic: Complexity from ginger, garlic, and fresh herbs
The magic happens when these elements come together in each bite, creating a taste experience that hits all the key flavor receptors on your palate.
Serving Suggestions
This versatile dish pairs beautifully with numerous sides. Here are my favorite ways to serve it:
As a Main Course
- Steamed jasmine rice or coconut rice
- Simple stir-fried vegetables like bok choy or broccoli
- Cucumber salad with rice vinegar dressing for a cooling contrast
As an Appetizer
- Served on small skewers with a dipping sauce
- In lettuce cups with thinly sliced vegetables
- Atop crispy wonton chips with a dollop of avocado cream
For a Complete Meal Experience
- Asian-inspired coleslaw with sesame dressing
- Steamed edamame with sea salt
- Fresh spring rolls with peanut dipping sauce
- Miso soup as a starter
Make-Ahead and Storage Tips
I often prepare components of this dish in advance when I know I’ll be short on time. Here’s how you can do the same:
Make-Ahead Options:
- The sweet chili sauce can be made up to 5 days ahead and stored in an airtight container in the refrigerator
- Chicken can be cut and stored in the refrigerator for up to 24 hours before cooking
- Garnishes can be prepared a day in advance and stored separately in the refrigerator
Storage and Reheating:
- Refrigerate leftovers in an airtight container for up to 3 days
- For best reheating results, warm in a skillet over medium heat with a tablespoon of water to revitalize the sauce
- Microwave on 70% power with a damp paper towel over the container to prevent the chicken from drying out
Freezing Instructions:
- Freeze cooked sweet chili chicken in an airtight container for up to 2 months
- Thaw overnight in the refrigerator before reheating
- You may need to add a fresh splash of sweet chili sauce when reheating to restore the glossy appearance
Variations to Try
Over the years, I’ve experimented with several variations of this recipe. Here are some of my favorites:
Sweet Chili Chicken Stir-Fry
Add bell peppers, snow peas, and carrots to create a complete one-pan meal. Stir-fry the vegetables until crisp-tender before adding the cooked chicken and sauce.
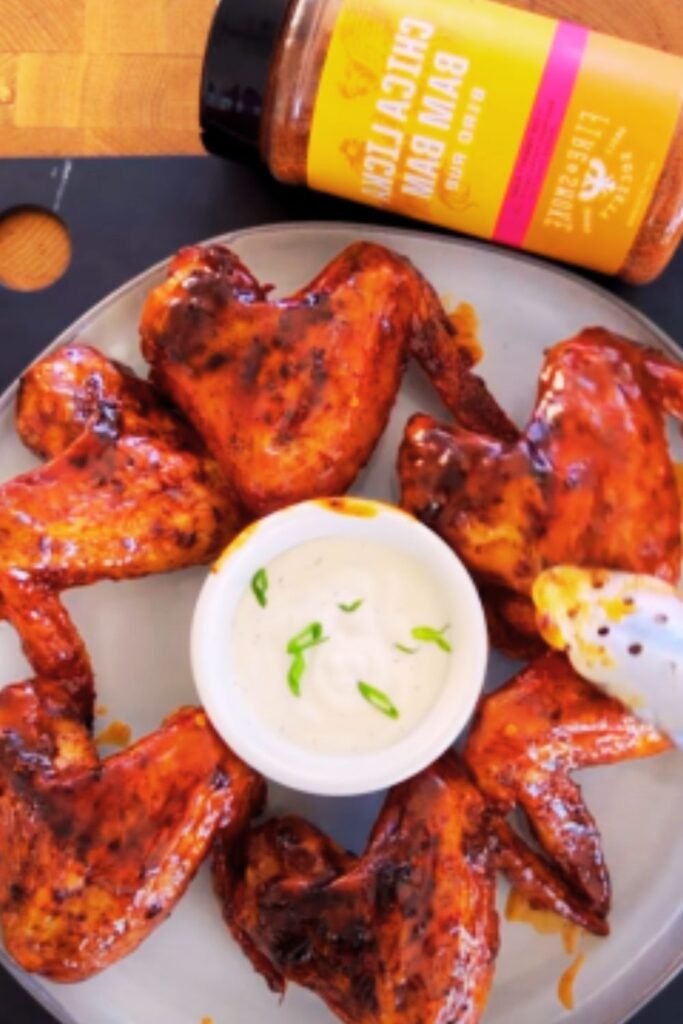
Baked Sweet Chili Chicken Wings
Apply this same sauce concept to chicken wings for an irresistible appetizer. Bake the wings until crispy, then toss in the sweet chili sauce.
Vegetarian Alternative
Substitute the chicken with extra-firm tofu that has been pressed and cubed. Follow the same cooking method, being gentle when tossing with the sauce.
Pineapple Sweet Chili Chicken
Add 1 cup of fresh pineapple chunks when combining the chicken and sauce for a tropical twist. The natural enzymes in the pineapple also help tenderize the chicken.
Adjusting the Heat Level
One of the beautiful aspects of this recipe is how easily you can customize the spiciness to suit your preference:
For Mild Flavor (Kid-Friendly):
- Reduce sriracha to 1 tablespoon
- Omit the fresh chilies entirely
- Add an extra tablespoon of sugar to balance the remaining heat
For Medium Heat (Most Popular):
- Use the recipe as written with 3 tablespoons sriracha
- Include just one deseeded chili
For Spice Enthusiasts:
- Increase sriracha to 4 tablespoons
- Use 2-3 red chilies with seeds intact
- Add 1/2 teaspoon crushed red pepper flakes to the sauce
For Extreme Heat (Caution Advised):
- Include 1 finely minced habanero or scotch bonnet pepper
- Increase sriracha to 5 tablespoons
- Add 1/4 teaspoon cayenne pepper to the cornstarch coating
Remember that the perceived heat level can vary based on individual tolerance, so always start milder and adjust upward in future preparations if needed.
Troubleshooting Common Issues
Even experienced cooks occasionally encounter challenges. Here are solutions to common problems you might face when preparing this dish:
Sauce Too Thick
- Add water, 1 tablespoon at a time, while stirring until desired consistency is reached
- Ensure you’re measuring the cornstarch accurately – too much will result in an overly thick sauce
Sauce Too Thin
- Mix an additional teaspoon of cornstarch with a tablespoon of cold water and add to the simmering sauce
- Allow the sauce to reduce further by simmering for a few more minutes
Chicken Not Browning
- Ensure chicken pieces are thoroughly patted dry before coating
- Check that your pan is properly preheated before adding the chicken
- Don’t overcrowd the pan – cook in batches if necessary
Sauce Separating
- Whisk vigorously to re-emulsify
- Ensure heat isn’t too high when combining sauce with chicken
- Make sure cornstarch slurry is well mixed before adding to the sauce
Too Spicy
- Add more sugar and a tablespoon of butter to mellow the heat
- Serve with plain yogurt or sour cream on the side
- Increase the amount of rice or sides to dilute the spiciness
Health and Dietary Adaptations
This recipe can be modified to accommodate various dietary needs without sacrificing flavor:
Gluten-Free Version
- Substitute soy sauce with tamari or coconut aminos
- Verify your sriracha is gluten-free (most brands are, but always check)
- Ensure your cornstarch is processed in a gluten-free facility
Lower Sugar Option
- Reduce sugar to 1/4 cup
- Substitute part or all of the sugar with a sugar alternative like monk fruit sweetener
- Add 1 tablespoon of unsweetened apple sauce for natural sweetness
Lower Sodium Adaptation
- Use low-sodium soy sauce
- Reduce salt in the chicken coating to 1/2 teaspoon
- Increase fresh herbs and spices to compensate for reduced sodium
Paleo-Friendly Modification
- Substitute arrowroot powder for cornstarch
- Use coconut aminos instead of soy sauce
- Replace sugar with honey or maple syrup (adjusting quantity as these are sweeter)

Frequently Asked Questions
Q: Can I use chicken breast instead of thighs?
Yes, you can substitute chicken breast, but be careful not to overcook it. Reduce the cooking time by about 1-2 minutes per side and check for doneness at 165°F (74°C). Consider marinating the breast pieces in a tablespoon of oil with a pinch of salt for 30 minutes before cooking to help maintain moisture.
Q: Is there a ready-made sweet chili sauce I can use to save time?
While homemade sauce delivers superior flavor, you can use store-bought sweet chili sauce in a pinch. Look for brands like Mae Ploy or Thai Kitchen for authentic flavor. You’ll need about 3/4 cup, and I recommend enhancing it with fresh garlic and ginger to elevate the taste.
Q: How can I make this dish ahead for a party?
For the best result, prepare the sauce and cook the chicken separately up to a day ahead. Store them refrigerated in separate containers. About 15 minutes before serving, gently reheat the chicken in a skillet, add the sauce, and finish cooking until heated through and glossy.
Q: Can I make this recipe in an air fryer?
Absolutely! Preheat your air fryer to 375°F (190°C). Spray the basket with oil, add the cornstarch-coated chicken in a single layer, and cook for 10-12 minutes, shaking halfway through. Warm the sauce separately, then toss with the cooked chicken before serving.
Q: What’s the best way to achieve that restaurant-quality glaze on the chicken?
The secret is in the cornstarch slurry and proper heat management. Make sure your sauce has adequately thickened before adding the chicken, and continue to cook for 1-2 minutes after combining to allow the sauce to reduce further and create that signature glossy coating.
Q: How spicy is this recipe as written?
As written, this recipe falls into the medium heat category. It has enough warmth to be interesting but won’t overwhelm most palates. Remember that the heat level of sriracha can vary by brand, so adjust accordingly.
Q: Can I make this dish in advance and freeze it?
Yes, you can freeze the cooked dish for up to 2 months. The texture of the sauce may change slightly upon thawing, becoming a bit less glossy. To revitalize when reheating, add a small splash of sweet chili sauce and mix well.
Chef’s Notes and Tips
After making this recipe countless times, I’ve collected some insights that can elevate your sweet chili chicken from good to exceptional:
- Quality Matters: Use fresh, high-quality chicken for the best texture and flavor
- Temperature Control: Make sure your pan is hot enough when adding the chicken – you should hear a sizzle
- Sauce Consistency: The perfect sauce should coat the back of a spoon but still flow slowly when tilted
- Taste As You Go: Everyone’s palate is different, so taste your sauce before adding it to the chicken and adjust seasonings as needed
- Rest Before Serving: Allow the finished dish to rest for 2-3 minutes before serving – this helps the sauce adhere better to the chicken
- Garnish Last Minute: Add fresh herbs just before serving to maintain their vibrant color and flavor
- Pan Material: A heavy-bottomed non-stick pan or well-seasoned cast iron skillet works best for even heat distribution
I hope this sweet chili chicken recipe becomes a favorite in your household as it has in mine. The combination of tender chicken pieces coated in that irresistibly sticky, sweet, and spicy sauce creates a dish that’s sure to impress. Whether you’re cooking for a weeknight family dinner or entertaining guests, this recipe delivers restaurant-quality results with minimal effort. Give it a try, and don’t be surprised when everyone asks for seconds!

