There’s something magical about waking up to the aroma of pancakes sizzling on the griddle. As a lifelong breakfast enthusiast, I’ve experimented with countless pancake variations over the years, but few have captured my heart quite like matcha powder pancakes. These vibrant green delights combine the earthy, complex flavor of Japanese matcha with the comforting familiarity of classic pancakes, creating a breakfast experience that’s both novel and nostalgic.
I first discovered matcha pancakes during a culinary workshop in Kyoto three years ago. The chef explained how matcha’s unique flavor profile—grassy, slightly bitter, with umami undertones—transforms ordinary pancake batter into something extraordinary. Since that memorable morning, I’ve spent countless hours perfecting my own recipe, balancing the distinctive matcha taste with just the right amount of sweetness.
In this article, I’ll share everything I’ve learned about creating perfect matcha powder pancakes, from selecting quality ingredients to mastering the cooking technique. Whether you’re a matcha aficionado looking to expand your repertoire or simply someone eager to bring a pop of color to your breakfast table, these pancakes are guaranteed to impress.
What Makes Matcha Special?
Before diving into the recipe, let’s take a moment to appreciate what makes matcha so unique:
Matcha : A finely ground powder made from specially grown and processed green tea leaves. Unlike regular green tea where leaves are steeped and discarded, with matcha, you consume the entire leaf, receiving all its nutritional benefits.
Ceremonial Grade : The highest quality matcha, traditionally used in Japanese tea ceremonies. It has a vibrant green color and smooth, delicate flavor without bitterness.
Culinary Grade : Slightly less expensive matcha specifically intended for cooking. It has a stronger flavor that stands up well to other ingredients, making it perfect for our pancakes.
L-theanine : An amino acid found in matcha that promotes alertness while simultaneously creating a sense of calm—giving you energy without the jitters often associated with other caffeinated beverages.
Catechins : Powerful antioxidants abundant in matcha that have been linked to various health benefits, including improved heart health and metabolism.
The combination of these unique properties makes matcha not just delicious but nutritionally beneficial as well. When incorporated into pancakes, it creates a breakfast that energizes and nourishes—a perfect way to start any day.
Essential Ingredients for Perfect Matcha Pancakes

The secret to exceptional matcha pancakes lies in using high-quality ingredients. Here’s what you’ll need:
The Core Ingredients
- Matcha Powder (2 tablespoons): The star of our show. I recommend using culinary-grade matcha for its stronger flavor that won’t get lost among other ingredients. Look for vibrant green powder without brownish tints, which indicate oxidation and diminished flavor.
- All-Purpose Flour (1½ cups): Provides structure to our pancakes. For a lighter texture, you can substitute up to half with cake flour.
- Baking Powder (2 teaspoons): The leavening agent that gives our pancakes their fluffy height. Make sure yours is fresh—baking powder loses potency over time.
- Salt (¼ teaspoon): Enhances all other flavors and balances sweetness.
- Granulated Sugar (3 tablespoons): Sweetens the batter and helps counterbalance matcha’s natural bitterness. You can adjust according to preference.
- Milk (1¼ cups): Provides moisture and helps activate the baking powder. I prefer whole milk for richness, but any type works.
- Eggs (2 large): Adds structure, richness, and helps bind ingredients together.
- Unsalted Butter (3 tablespoons, melted): Contributes richness and tenderness to the pancakes.
- Vanilla Extract (1 teaspoon): Complements the earthy notes of matcha with warm, aromatic sweetness.
Optional Flavor Enhancers
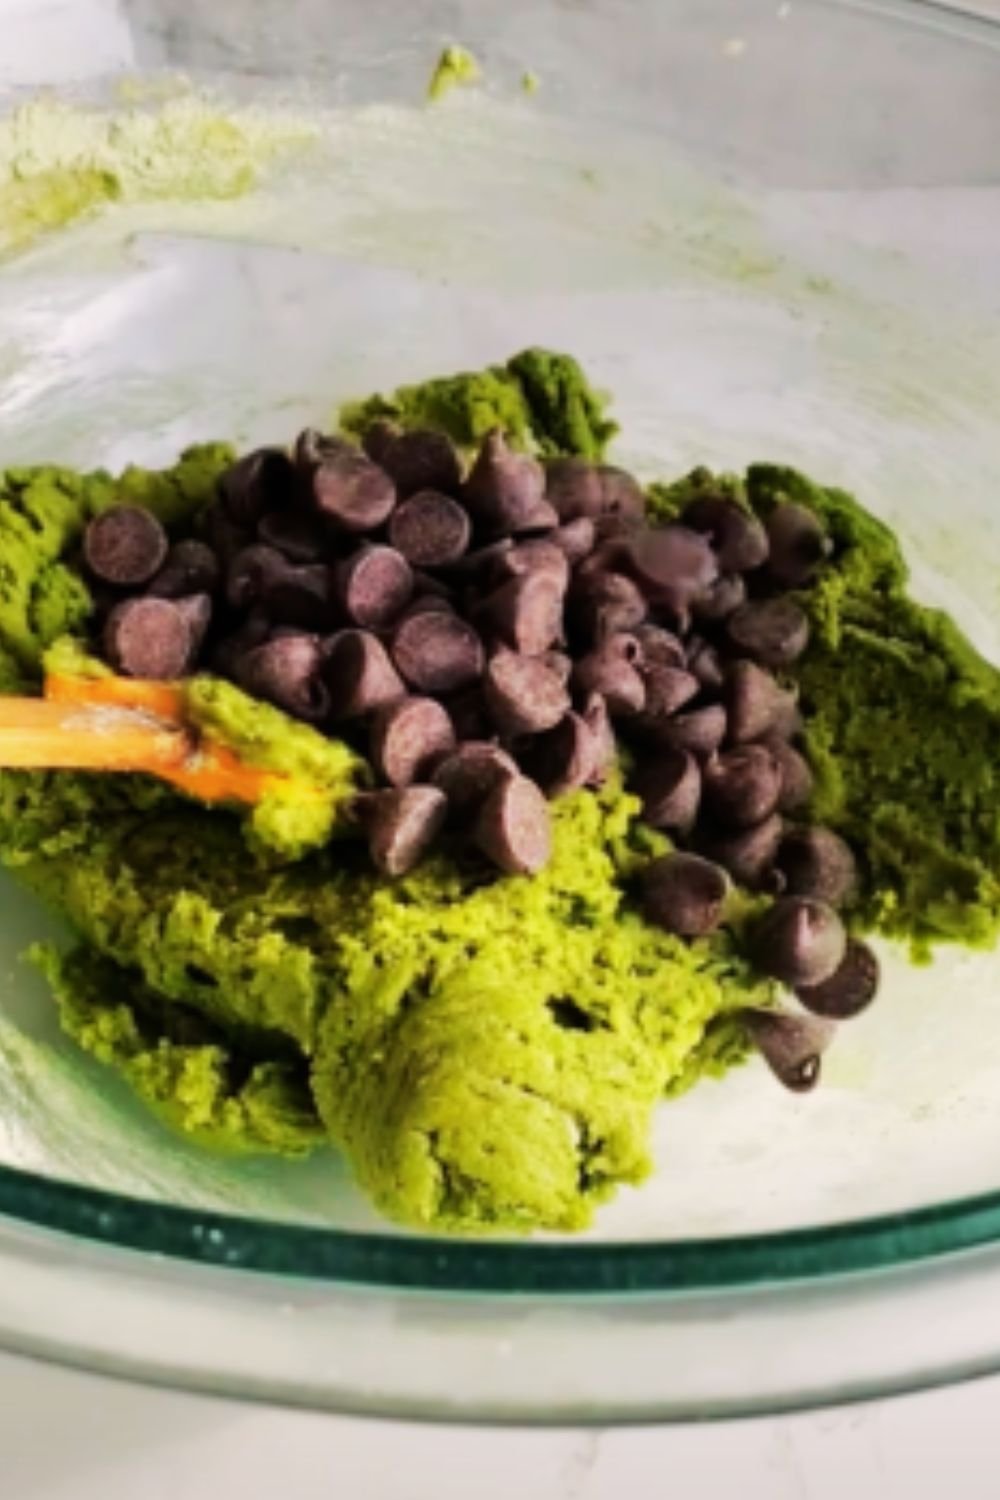
- White Chocolate Chips (½ cup): Their creamy sweetness pairs beautifully with matcha’s earthiness.
- Almond Extract (¼ teaspoon): Adds a subtle nutty dimension that complements matcha wonderfully.
- Coconut Milk: Substitute for regular milk to add tropical undertones.
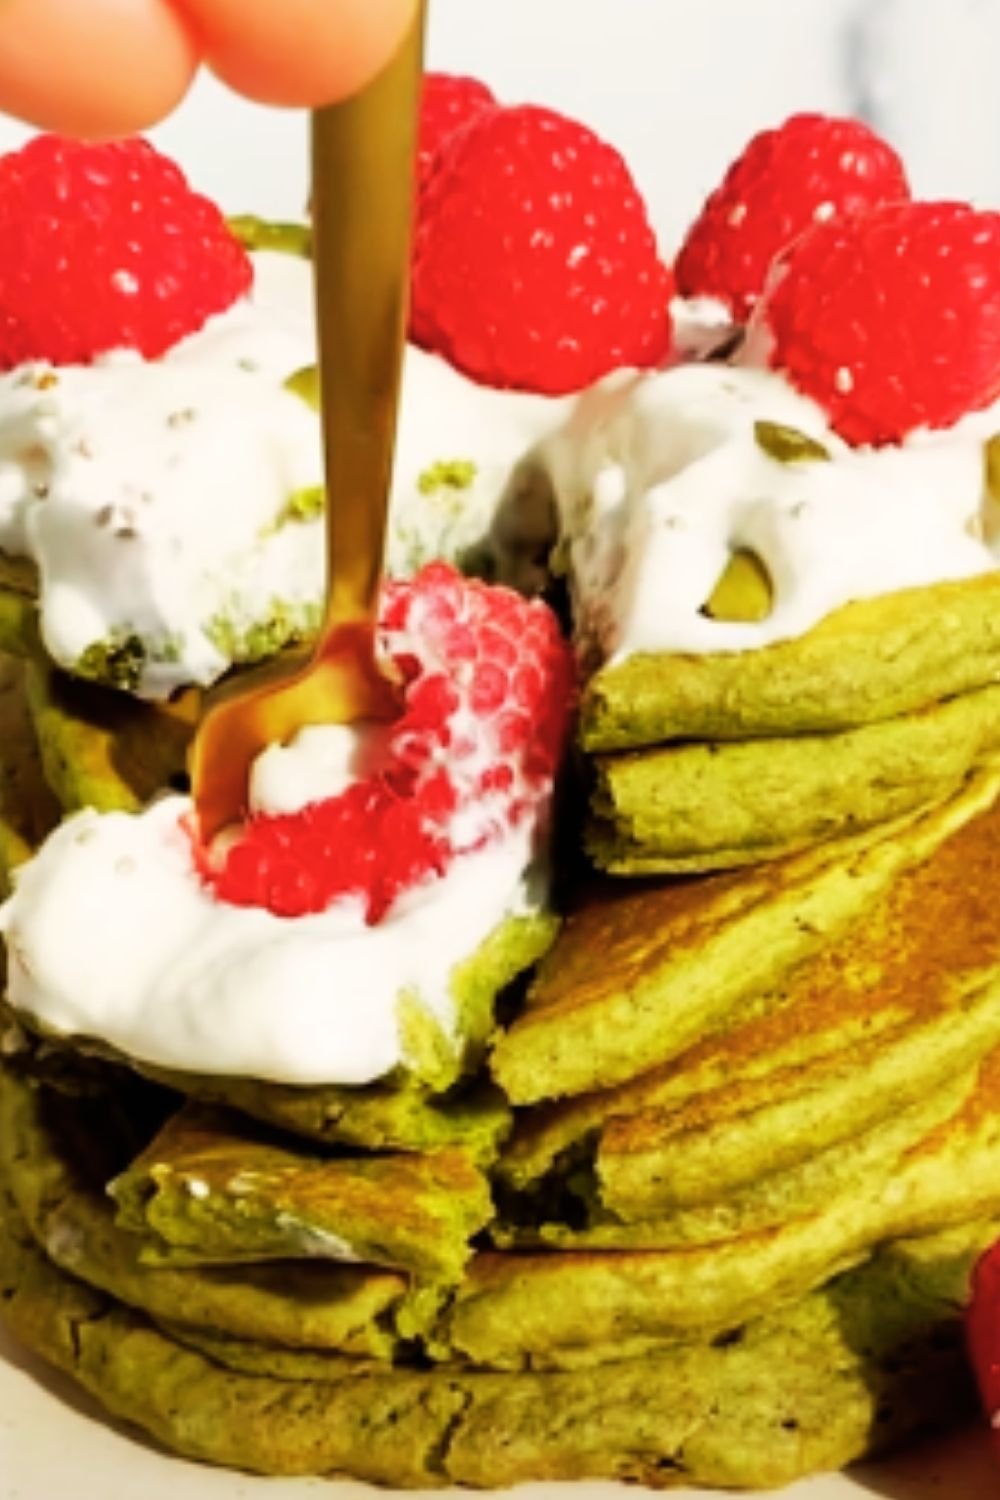
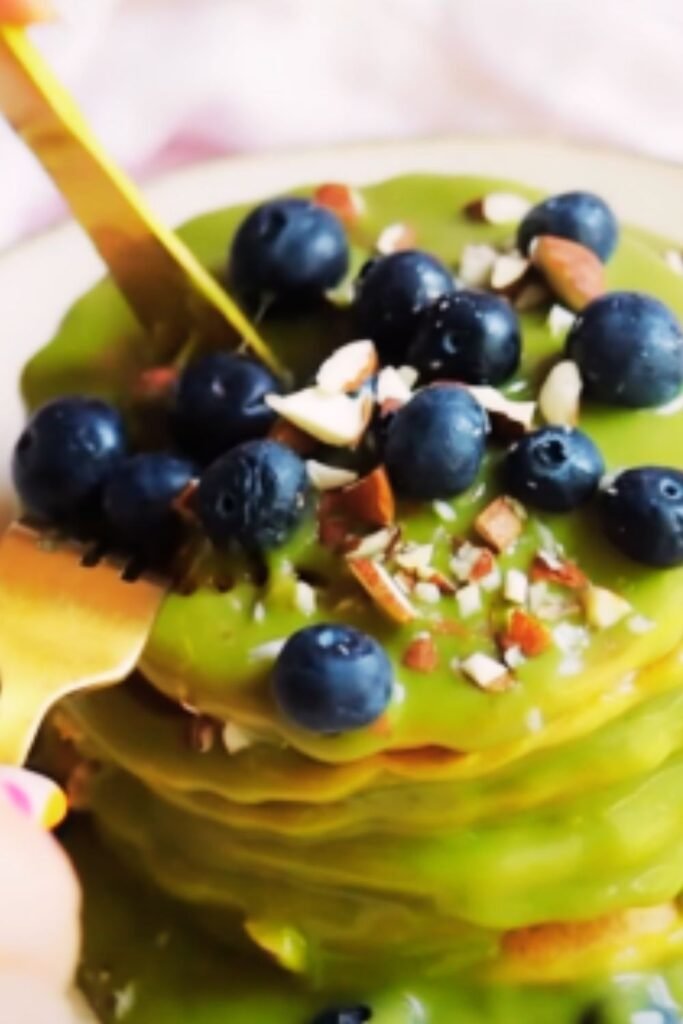
- Fresh Berries: Blueberries or raspberries add bursts of tartness that contrast nicely with matcha’s flavor.
The Science Behind Perfect Pancake Batter
Creating the ideal matcha pancake batter is both an art and a science. The key is achieving the proper consistency and incorporating the matcha powder effectively to avoid clumps.
First, let’s address matcha incorporation. Matcha powder tends to clump when added directly to wet ingredients. To prevent this, I always sift the matcha powder with the dry ingredients or create a matcha paste first. For the paste method, mix the matcha with a small amount of hot (not boiling) water until smooth, then incorporate it into your wet ingredients.
For batter consistency, remember this golden rule: a few small lumps are good! Overmixing develops gluten, resulting in tough, rubbery pancakes. Mix just until the ingredients are incorporated, with a few small lumps remaining for tender, fluffy results.
Here’s a detailed comparison of different mixing methods and their results:
| Mixing Method | Texture | Rise | Flavor Distribution | Best For |
|---|---|---|---|---|
| Whisk by Hand (minimal mixing) | Tender, fluffy | Moderate | May have some matcha streaking | Everyday pancakes |
| Hand Mixer (10 seconds) | Uniform, slightly less tender | High | Even matcha distribution | Photo-worthy pancakes |
| Blender | Smooth, potentially dense | Low | Perfect distribution | Thin pancakes or crepes |
| Fold with Spatula | Very tender with distinct pockets | Highest | Some matcha streaking | Ultra-fluffy Japanese-style pancakes |
| Sifting Matcha First | Tender | High | Even color without overmixing | Best overall method |
Temperature also matters significantly. Allow refrigerated ingredients like eggs and milk to come to room temperature before mixing. Cold ingredients don’t incorporate as smoothly and can cause your melted butter to resolidify, creating an uneven batter.
Step-by-Step Matcha Pancake Preparation
Preparing the Batter
- Sift together flour, matcha powder, baking powder, and salt into a large bowl. This aerates the dry ingredients and eliminates any matcha clumps.
- In a separate bowl, whisk together eggs, milk, melted butter, vanilla extract, and sugar until well combined.
- Create a well in the center of your dry ingredients and pour in the wet mixture.
- Using a rubber spatula or wooden spoon, fold the ingredients together with gentle, sweeping motions. Stop when just combined—about 10-12 strokes. The batter should be thick but pourable, with small lumps visible.
- Allow the batter to rest for 15-20 minutes. This crucial step relaxes the gluten, dissolves the sugar, and allows the baking powder to activate, resulting in fluffier pancakes.
Cooking the Perfect Pancakes
- Heat a non-stick skillet or griddle over medium heat. To test if it’s ready, sprinkle a few drops of water on the surface—they should dance and evaporate quickly.
- Lightly grease the cooking surface with butter or neutral oil. I prefer using a paper towel to spread a thin, even layer.
- Using a ¼-cup measuring cup, pour batter onto the hot surface. For perfectly round pancakes, pour from a height of about 1 inch above the surface and don’t spread the batter.
- Cook until bubbles form on the surface and the edges appear set, about 2-3 minutes.
- Flip with a thin spatula and cook for another 1-2 minutes until golden brown on both sides and cooked through.
- Transfer to a warm plate and cover loosely with foil while cooking remaining pancakes.
A common mistake is flipping pancakes too early or too late. Wait until bubbles form across the surface and begin to pop, leaving small holes that don’t immediately fill in. The edges should look set but not dry. If you flip too early, the pancake may fall apart; too late, and it may become dry.
Another tip for evenly cooked batches: wipe your pan or griddle clean between batches and reapply a thin layer of butter or oil. This prevents burnt residue from affecting subsequent pancakes.
Temperature Control: The Unsung Hero
Temperature management might be the most overlooked aspect of pancake-making. Too hot, and your pancakes will burn outside while remaining raw inside. Too cool, and they’ll absorb excess oil, becoming greasy and dense.
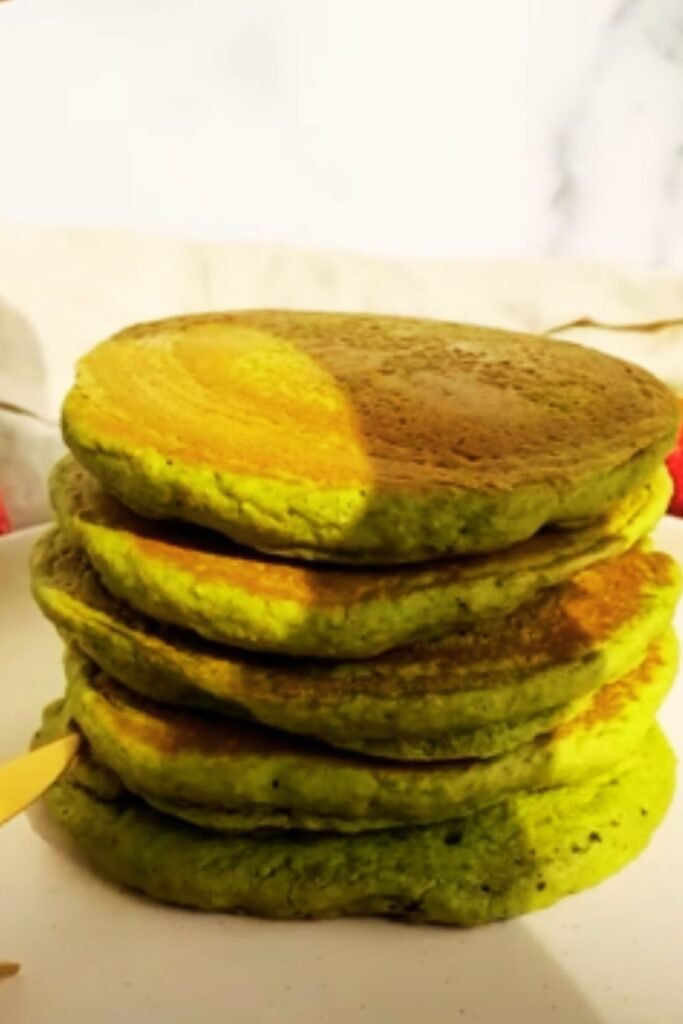
I’ve found that medium heat (about 350°F on a griddle) works best for matcha pancakes. The slightly lower temperature than traditional pancakes (which often cook at 375°F) prevents the matcha from developing bitter notes that can emerge when overheated.
If you’re making multiple batches, you may need to adjust the heat downward slightly as you continue cooking, as most pans continue to absorb and retain heat over time.
Matcha Quality and Selection Guide
The quality of matcha you choose will significantly impact your pancakes’ flavor and color. Here’s what to look for:
| Matcha Grade | Color | Flavor Profile | Best Used For | Price Range |
|---|---|---|---|---|
| Ceremonial | Vibrant jade green | Sweet, smooth, complex with minimal bitterness | Traditional tea drinking | $25-70 per oz |
| Premium Culinary | Bright green | Slightly stronger, balanced sweet-bitter notes | Baking, lattes, pancakes | $15-25 per oz |
| Basic Culinary | Muted green, sometimes with yellow/brown tints | More assertive, prominently bitter | Smoothies, ice cream base | $7-15 per oz |
| Food Grade | Olive green or darker | Very strong, often bitter | Food coloring, large batch cooking | $3-7 per oz |
For these pancakes, I recommend premium culinary grade. It offers the perfect balance of flavor strength to shine through the other ingredients while maintaining a beautiful color without breaking the bank.
When purchasing matcha, check the packaging date and ensure it comes in an opaque, airtight container. Matcha begins oxidizing as soon as it’s ground, losing both flavor and nutritional value when exposed to air and light.
Topping Ideas and Serving Suggestions
The distinctive flavor of matcha pancakes opens up unique topping possibilities beyond traditional maple syrup. Here are some of my favorites:
Sweet Options
- White Chocolate Sauce: Melt white chocolate chips with a splash of heavy cream for a decadent topping that complements matcha’s earthiness.
- Honey-Yuzu Drizzle: Mix honey with a few drops of yuzu juice for a Japanese-inspired citrus sweetener.
- Sweet Red Bean Paste (Anko): A traditional Japanese pairing with matcha that adds sweetness and texture.
- Coconut Whipped Cream: Top with lightly sweetened coconut whipped cream and toasted coconut flakes.
- Fresh Berries: Strawberries, blueberries, and blackberries provide tart contrast to the earthy matcha.
Creamy Additions
- Mascarpone Cream: Whip mascarpone cheese with a touch of powdered sugar and vanilla for a rich, tangy topping.
- Greek Yogurt with Honey: Offers protein and probiotics with natural sweetness.
- Black Sesame Ice Cream: For an indulgent brunch dessert, the nutty flavor pairs beautifully with matcha.
- Sweetened Condensed Milk: Drizzle lightly for intense sweetness that balances matcha’s bitterness.
Texture Enhancers
- Crushed Pistachios: Add crunch and complement the green color theme.
- Toasted Almonds: Their nutty flavor enhances matcha’s complexity.
- Granola Clusters: Provide satisfying texture contrast.
- Adzuki Beans: Traditional Japanese pairing offering earthy sweetness and protein.
For a complete breakfast experience, serve your matcha pancakes with:
- Fresh fruit salad with citrus elements
- Crispy bacon or breakfast sausage (the savory-sweet contrast works surprisingly well)
- A small pot of ginger tea, which complements matcha’s flavor profile
- Orange juice for refreshing acidity
Troubleshooting Common Matcha Pancake Problems
Even experienced cooks encounter occasional pancake problems. Here are solutions to the most common issues specifically related to matcha pancakes:
Pale Color Instead of Vibrant Green
- Problem: Using low-quality or oxidized matcha.
- Solution: Invest in fresher, higher-quality matcha powder and store it properly in an airtight, opaque container in the refrigerator.
Bitter Taste
- Problem: Too much matcha or cooking at too high temperature.
- Solution: Start with 1-1.5 tablespoons of matcha and adjust to taste in future batches. Cook at medium rather than medium-high heat.
Matcha Clumps in Batter
- Problem: Adding matcha directly to wet ingredients.
- Solution: Always sift matcha with dry ingredients or create a smooth paste with hot water first.
Pancakes Too Dense
- Problem: Overmixing the batter or using cold ingredients.
- Solution: Mix until just combined and allow ingredients to reach room temperature before mixing.
Uneven Cooking
- Problem: Inconsistent heat distribution or incorrect timing.
- Solution: Use a heavy-bottomed pan or electric griddle with temperature control. Watch for proper bubble formation before flipping.
Gummy Interior
- Problem: Too much liquid or undercooking.
- Solution: Adjust your wet-to-dry ingredient ratio and ensure pancakes are fully cooked before serving.
Health Benefits: Matcha as a Nutritional Powerhouse
One aspect I particularly love about matcha pancakes is their nutritional advantages over traditional varieties. Matcha contains an impressive array of beneficial compounds:
- Catechins: Powerful antioxidants, particularly epigallocatechin gallate (EGCG), which has been studied for its cancer-fighting properties.
- L-theanine: Promotes calm alertness and concentration without jitters or crashes.
- Chlorophyll: Gives matcha its vibrant green color and has detoxifying properties.
- Vitamins and Minerals: Contains vitamin C, zinc, magnesium, chromium, and selenium.
While you won’t get the same concentration of benefits as drinking matcha tea straight, incorporating it into pancakes is a delicious way to add some nutritional value to a breakfast treat. The L-theanine combined with matcha’s natural caffeine provides a sustained energy boost—perfect for weekend mornings when you want to remain productive without feeling jittery.
To maximize the nutritional benefits, I sometimes add ground flaxseed or chia seeds to my batter, which complement matcha’s earthy flavor while adding omega-3 fatty acids and additional fiber.
Matcha Pancakes Around the World
Matcha’s global popularity has led to fascinating regional variations of matcha pancakes:
- Japan: Soufflé-style pancakes with matcha, extremely thick and fluffy, often served with red bean paste.
- France: Thin matcha crêpes filled with chestnut cream or white chocolate ganache.
- Australia: Matcha ricotta hotcakes topped with honeycomb butter and fresh fruits.
- Korea: Hotteok-inspired stuffed matcha pancakes with sweet red bean or black sesame filling.
- Hawaii: Matcha-coconut pancakes topped with tropical fruits and coconut syrup.
These international variations demonstrate matcha’s versatility and appeal across different culinary traditions. During my travels, I’ve been inspired by these interpretations and often incorporate elements from each into my own matcha pancake creations.
Storing and Reheating
While matcha pancakes are best enjoyed fresh off the griddle, busy mornings sometimes require make-ahead options. Here’s how to store and reheat them effectively:
Storage Methods
- Refrigeration: Place cooled pancakes in an airtight container with parchment paper between layers to prevent sticking. Refrigerate for up to 3 days.
- Freezing: Arrange completely cooled pancakes in a single layer on a baking sheet and freeze until solid (about 1 hour). Transfer to a freezer bag with parchment between layers. Freeze for up to 1 month.
Reheating Techniques
- Microwave: Place 2-3 pancakes on a microwave-safe plate and cover with a damp paper towel. Heat on 50% power for 30-second intervals until warmed through.
- Toaster: For crispy edges, pop refrigerated (not frozen) pancakes into a toaster on a low setting.
- Oven: Arrange pancakes in a single layer on a baking sheet. Cover with foil and heat at 350°F for 5-10 minutes (longer if frozen).
- Skillet: For a fresh-off-the-griddle taste, lightly butter a skillet over medium-low heat and warm pancakes for 1-2 minutes per side.
I find the oven method preserves the texture best, while the skillet approach revives some of that freshly-made quality. The microwave is quickest but can sometimes make the pancakes slightly rubbery—the damp paper towel helps prevent this.
Questions & Answers
Is culinary grade matcha really necessary, or can I use ceremonial grade?
You can absolutely use ceremonial grade matcha if that’s what you have on hand. In fact, it will produce pancakes with an even more delicate, sweeter flavor profile. However, ceremonial matcha is significantly more expensive and its subtle nuances might get partially lost amid the other pancake ingredients. That’s why I typically recommend saving your ceremonial matcha for drinking straight and using culinary grade for cooking projects like these pancakes.
Can I make these pancakes gluten-free?
Yes! I’ve successfully made gluten-free matcha pancakes by substituting the all-purpose flour with a 1:1 gluten-free baking flour blend. Look for one that contains xanthan gum for best results. You may need to add an extra tablespoon or two of milk, as gluten-free flours tend to absorb more liquid. Rice flour also works particularly well with matcha’s flavor profile.
My pancakes aren’t as vibrantly green as yours. What am I doing wrong?
The vibrancy comes down to three factors: matcha quality, quantity, and cooking temperature. First, ensure you’re using fresh, good-quality matcha with a bright green color. Second, you might need to increase the amount slightly—try an additional half tablespoon. Finally, lower your cooking temperature; high heat can cause matcha to brown and lose its vibrant color.
How can I make these pancakes vegan?
Great question! Substitute the milk with almond, soy, or oat milk (oat provides the creamiest texture). Replace eggs with either a flax egg (1 tablespoon ground flaxseed mixed with 3 tablespoons water per egg) or ¼ cup applesauce per egg. Use coconut oil or vegan butter instead of regular butter. The pancakes will be slightly denser but still delicious.
Can I prepare the batter the night before?
While convenient, I don’t recommend making the entire batter ahead as the baking powder will activate upon mixing with liquid ingredients, and you’ll lose much of the leavening power overnight. However, you can mix all dry ingredients (including the matcha) and all wet ingredients separately, refrigerate both, then combine them in the morning. Let the mixed batter rest for 10 minutes before cooking.
Why did my matcha pancakes taste bitter?
Bitterness usually comes from either using too much matcha or cooking the pancakes at too high a temperature. Matcha naturally has some bitterness, but excessive heat can intensify this quality. Start with less matcha (1-1.5 tablespoons) and cook over medium heat. Adding a touch more vanilla or sweetener can also help balance any bitterness.
Are there any savory variations of matcha pancakes?
Absolutely! For a savory twist, reduce the sugar to 1 teaspoon, omit the vanilla, and add 1 tablespoon of sesame seeds and 2 tablespoons of chopped scallions to the batter. Serve with a dollop of wasabi-spiked sour cream and smoked salmon for an impressive brunch option. The earthy notes of matcha work surprisingly well in savory applications.
Can I use this batter for waffles instead?
You can, with a slight modification! For waffles, add an extra tablespoon of melted butter to the batter for more crispness. Matcha waffles develop beautiful grid patterns that showcase the vibrant green color. Cook according to your waffle iron’s instructions, but generally at a slightly lower temperature setting than regular waffles to preserve the matcha color.
The beauty of matcha pancakes lies in their versatility and distinctive flavor. Whether you’re a matcha enthusiast or simply looking to add some variety to your breakfast routine, these vibrant green pancakes offer a delightful culinary experience. Their subtle earthiness, gentle sweetness, and stunning color make them not just a meal but a memorable cooking adventure worth sharing with friends and family.
Remember, as with any culinary skill, perfecting your matcha pancakes takes practice. Don’t be discouraged if your first batch isn’t picture-perfect—focus on the flavor and enjoy the process. Before long, you’ll be creating stacks of these gorgeous green pancakes with confidence and ease.