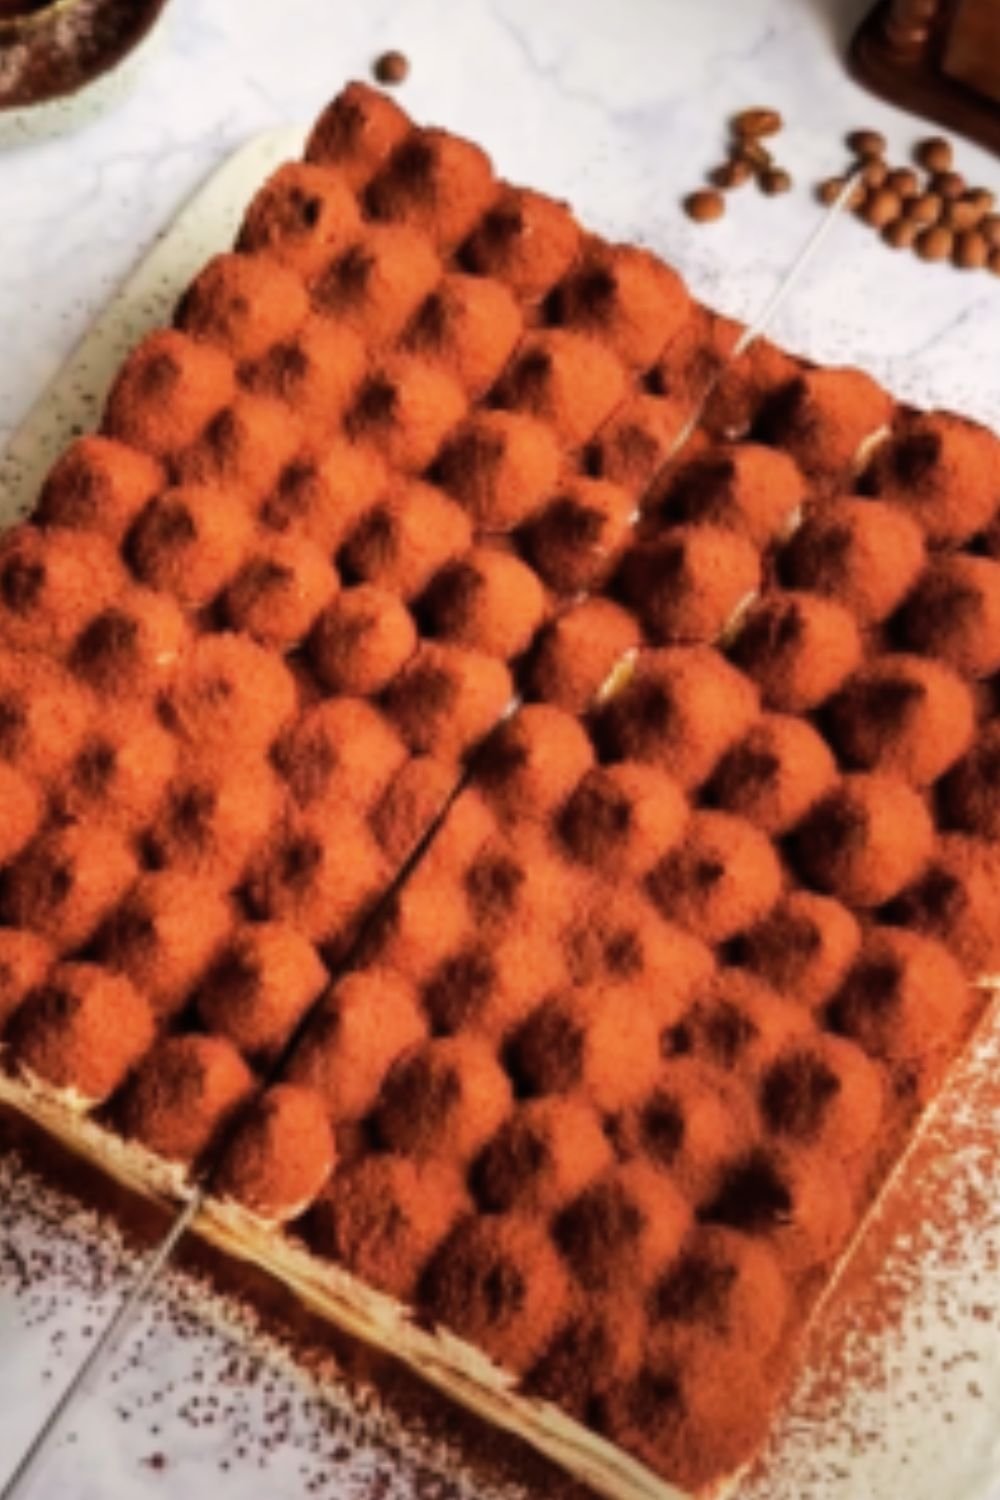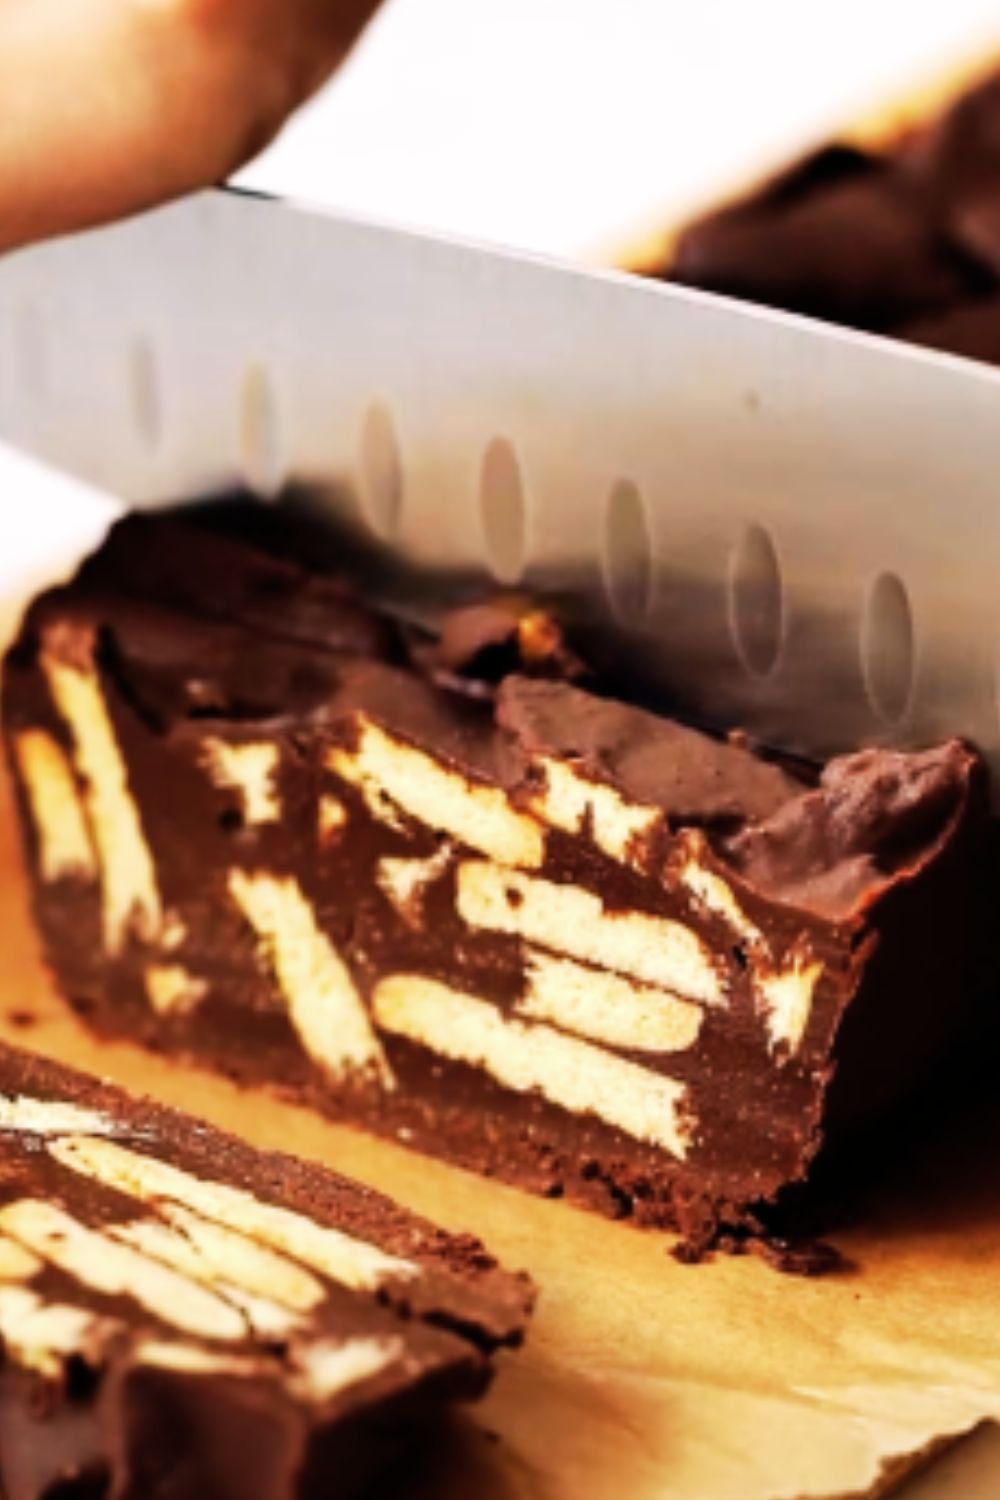
There’s something magical about desserts that don’t require an oven. They represent that perfect intersection of minimal effort and maximum satisfaction. And when it comes to no-bake treats, this chocolate biscuit cake reigns supreme in my kitchen. With its rich chocolate ganache encasing layers of crisp biscuits that soften to cake-like perfection, it’s truly a dessert fit for royalty – and I mean that quite literally, as variations of this recipe have been favorites among British royalty for generations!
I first discovered this delightful confection years ago when looking for a simple yet impressive dessert for unexpected guests. Since then, it’s become my go-to recipe when I crave something decadent but don’t want to spend hours in the kitchen. The beauty of this cake lies in its simplicity – just a handful of quality ingredients transformed into something extraordinary with minimal effort.
Why You’ll Love This Recipe
Before diving into the step-by-step process, let me share why this recipe deserves a permanent spot in your dessert rotation:
- No oven required: Perfect for summer days when you don’t want to heat up the kitchen
- Make-ahead friendly: Actually tastes better after sitting in the refrigerator for a day
- Customizable: Easily adaptable with different mix-ins and toppings
- Crowd-pleaser: Appeals to all ages and chocolate lovers of every kind
- Foolproof: Nearly impossible to mess up, even for baking novices
Ingredients You’ll Need
For this luxurious no-bake chocolate biscuit cake, quality ingredients make all the difference. Here’s everything you’ll need to serve 10-12 people:
For the Cake Base:
- 400g digestive biscuits (can substitute graham crackers or rich tea biscuits)
- 225g unsalted butter
- 225g dark chocolate (70% cocoa solids)
- 100g granulated sugar
- 3 tablespoons golden syrup (or honey)
- 3 tablespoons unsweetened cocoa powder
- 1 teaspoon vanilla extract
- Pinch of salt
For the Chocolate Ganache:
- 200g dark chocolate (70% cocoa solids)
- 200ml heavy cream
- 25g unsalted butter
Optional Mix-ins (choose 1-2):
- 100g dried cherries
- 100g chopped toasted nuts (walnuts, hazelnuts, or pistachios work beautifully)
- 100g mini marshmallows
- 2 tablespoons orange zest
- 100g crystallized ginger, finely chopped
Equipment Needed
One of the joys of this recipe is how little equipment you need:
- 8-inch springform pan or loaf tin
- Parchment paper
- Large mixing bowl
- Medium saucepan
- Spatula
- Food processor or rolling pin and ziplock bag (for crushing biscuits)
- Measuring cups and spoons
- Refrigerator (of course!)
Step-by-Step Instructions
Preparing the Biscuit Base
- Prepare your pan: Line an 8-inch springform pan with parchment paper, ensuring the paper comes up the sides a bit.
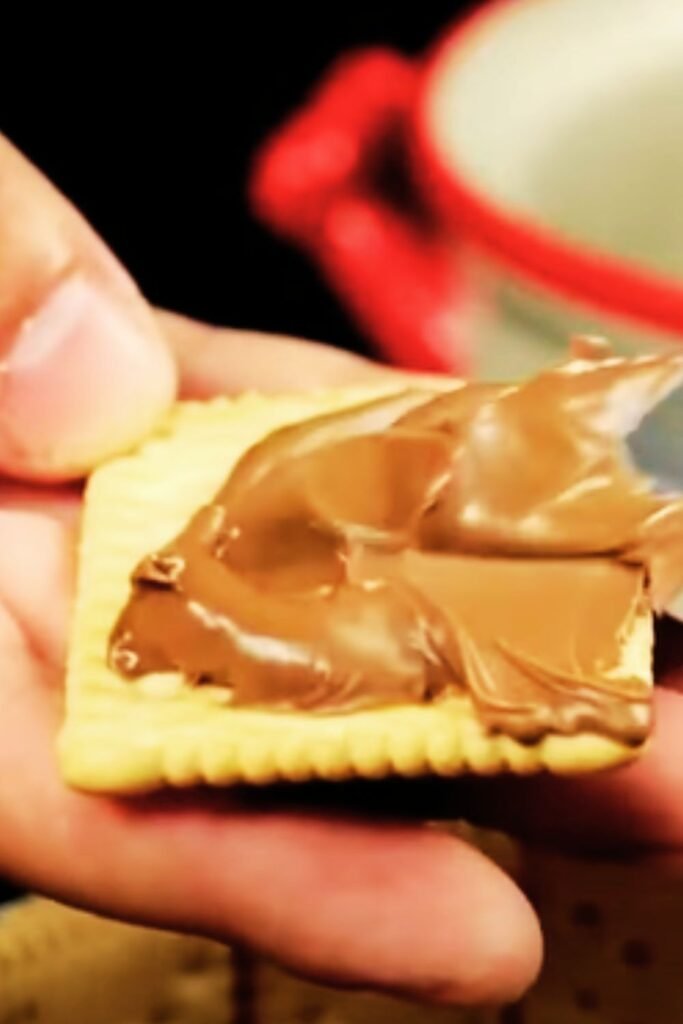
- Crush the biscuits: Place the digestive biscuits in a food processor and pulse until you have a mixture of fine crumbs and small chunks (about the size of peas). If you don’t have a food processor, place the biscuits in a sealed plastic bag and crush them with a rolling pin. The texture variation makes for a more interesting final cake.
- Create the chocolate mixture: In a medium saucepan over low heat, combine the butter, chocolate, sugar, golden syrup, cocoa powder, and salt. Stir continuously until everything is melted and well combined. Remove from heat and stir in the vanilla extract.
- Combine with biscuits: Pour the warm chocolate mixture over the crushed biscuits and stir until all the biscuit pieces are thoroughly coated. If you’re using any of the optional mix-ins, fold them in now.
- Transfer to pan: Spoon the mixture into your prepared pan, pressing down firmly with the back of a spoon to eliminate air pockets. Pay special attention to the edges and corners.
- Initial chill: Place the pan in the refrigerator while you prepare the ganache. This helps set the base slightly.
Making the Chocolate Ganache
- Prepare the chocolate: Finely chop the dark chocolate and place it in a heatproof bowl.
- Heat the cream: In a small saucepan, bring the heavy cream just to a simmer. Watch it carefully as cream can boil over quickly.
- Create the ganache: Pour the hot cream over the chopped chocolate and let it sit for 2 minutes. Then, stir gently until the chocolate is completely melted and the mixture is smooth and glossy.
- Add the butter: While the ganache is still warm, add the butter and stir until incorporated. This gives the ganache a beautiful shine.
Finishing the Cake
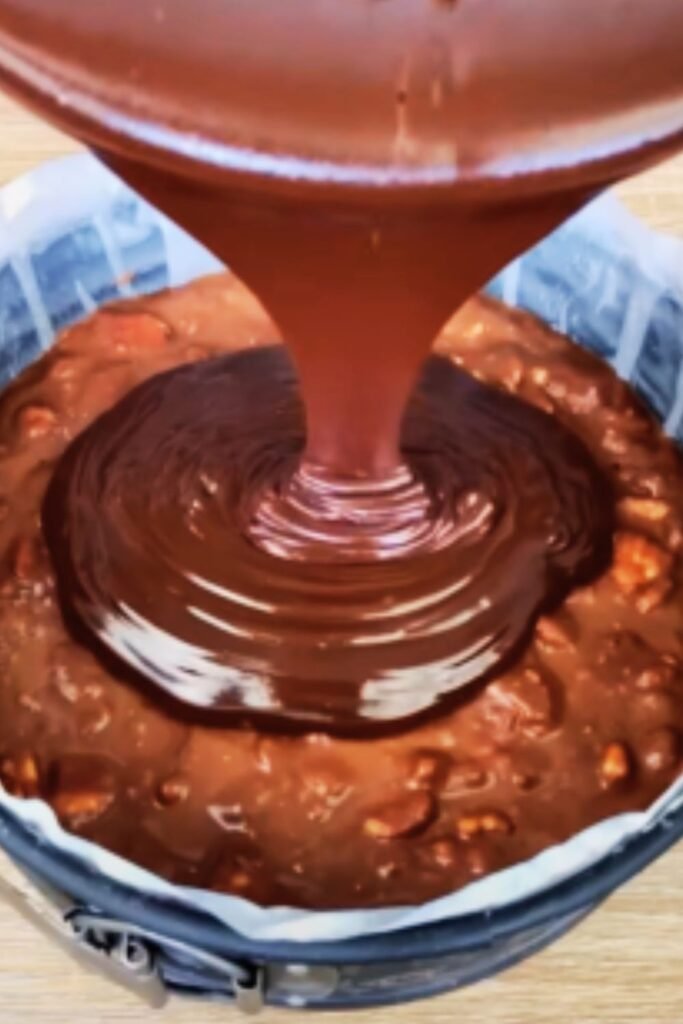
- Add the ganache: Remove the cake from the refrigerator and pour the ganache over the top, using a spatula to spread it evenly and ensure it drips down the sides if you’re using a loaf tin.
- Final chill: Return the cake to the refrigerator and let it set for at least 4 hours, but preferably overnight. This waiting period allows the biscuits to soften slightly and the flavors to meld together.
- Serve: To serve, remove the cake from the springform pan and carefully peel away the parchment paper. If you used a loaf tin, you can use the overhanging parchment to lift the cake out before slicing.
Tips for Perfection
To ensure your chocolate biscuit cake turns out perfectly every time, keep these tips in mind:
- Quality matters: Use the best quality chocolate you can afford. Since chocolate is the star ingredient, its flavor will significantly impact the final result.
- Temperature control: When melting chocolate, always use low heat and stir constantly to prevent burning.
- Texture balance: The ideal texture includes both fine crumbs and small biscuit pieces for an interesting mouthfeel.
- Chilling time: Don’t rush the chilling process. The longer the cake sits, the better it tastes as the flavors meld and the biscuits soften to the perfect consistency.
- Slicing tip: For clean slices, dip your knife in hot water and wipe it dry between cuts.
Variations to Try

The basic chocolate biscuit cake recipe is wonderfully versatile. Here are some delicious variations to experiment with:
Flavor Variations
| Variation | Added Ingredients | Notes |
|---|---|---|
| Mocha Bliss | 2 tablespoons instant coffee powder added to the chocolate mixture | Perfect for coffee lovers |
| Orange Chocolate | 2 tablespoons orange zest + 2 tablespoons orange liqueur | A classic flavor combination |
| Mint Chocolate | 1 teaspoon peppermint extract + crushed peppermint candies on top | Refreshing and festive |
| Hazelnut Crunch | 100g chopped toasted hazelnuts + 2 tablespoons Frangelico | Nutella vibes! |
| Salted Caramel | Drizzle of salted caramel sauce between layers and on top | Sweet and salty perfection |
Presentation Variations
| Style | Method | Best For |
|---|---|---|
| Individual Portions | Use a muffin tin lined with paper liners | Parties and portion control |
| Trifle Style | Layer broken biscuit mixture with whipped cream in a trifle dish | Elegant dinner parties |
| Cake Pops | Roll chilled mixture into balls, insert sticks, and dip in chocolate | Kid-friendly treats |
| Layered Cake | Alternate biscuit mixture with layers of ganache | Special occasions |
| Ice Cream Cake | Sandwich a layer of ice cream between two thin layers of biscuit mixture | Summer celebrations |
Make-Ahead and Storage
One of the best things about this cake is how well it keeps. Here’s what you need to know about making it ahead and storing leftovers:
- Make-ahead: This cake is actually better when made a day in advance, making it perfect for entertaining.
- Refrigeration: Properly stored in an airtight container, the cake will keep in the refrigerator for up to 5 days.
- Freezing: You can freeze the cake (without the ganache) for up to 3 months. Thaw overnight in the refrigerator before adding the ganache and serving.
- Room temperature: For the best texture and flavor, remove the cake from the refrigerator about 20 minutes before serving.
Serving Suggestions
While this cake is absolutely delicious on its own, here are some ideas to elevate it for serving:
- Dust with cocoa powder or powdered sugar for a simple yet elegant finish
- Serve with a dollop of lightly sweetened whipped cream
- Add a scoop of vanilla ice cream for a delightful temperature contrast
- Pair with fresh berries for a fruity complement to the rich chocolate
- Drizzle with additional warm ganache for an extra decadent experience
- Serve with a hot cup of coffee or tea for balance
- For special occasions, decorate with edible gold leaf or chocolate curls
Accompaniments Table
| Accompaniment | Flavor Profile | Presentation Tip |
|---|---|---|
| Fresh berries | Tart, fresh | Scatter around the plate for color |
| Whipped cream | Creamy, light | Pipe decorative swirls on top or side |
| Ice cream | Cold, creamy | Serve in quenelles for elegance |
| Chocolate sauce | Rich, intense | Drizzle in a decorative pattern |
| Fruit coulis | Bright, tangy | Create dots or swirls on the plate |
| Mint leaves | Fresh, aromatic | Add as a small garnish for color |
| Crushed nuts | Crunchy, toasty | Sprinkle around the edge of the plate |
Nutritional Information
While this is definitely a treat and not an everyday indulgence, here’s the approximate nutritional information per serving (assuming 12 servings):
| Nutrient | Amount |
|---|---|
| Calories | 420 |
| Total Fat | 28g |
| Saturated Fat | 16g |
| Cholesterol | 52mg |
| Sodium | 180mg |
| Total Carbohydrates | 42g |
| Dietary Fiber | 3g |
| Sugars | 26g |
| Protein | 4g |
Frequently Asked Questions

Can I use milk chocolate instead of dark chocolate? Yes, you can substitute milk chocolate, but the cake will be considerably sweeter. I’d recommend reducing the sugar by half if you go this route.
My cake seems too crumbly. What went wrong? The most likely cause is that there wasn’t enough “glue” (the chocolate mixture) to hold the biscuit pieces together. Make sure you have the right proportion of biscuits to chocolate mixture, and press the mixture very firmly into the pan.
Can I make this cake gluten-free? Absolutely! Simply use your favorite gluten-free biscuits or cookies in place of the digestive biscuits.
What can I substitute for golden syrup? Honey, maple syrup, or corn syrup will all work as substitutes, though each will bring a slightly different flavor profile to the cake.
How do I know when the cake is properly set? The cake should feel firm to the touch and the ganache should not be tacky when gently pressed with a finger.
Can I add alcohol to this recipe? Yes! Add 2-3 tablespoons of your favorite liqueur (think Baileys, Kahlúa, or Grand Marnier) to the chocolate mixture for an adult version.
My ganache separated or looks grainy. Can I fix it? If your ganache separates, you can usually rescue it by whisking in a little warm cream. If it’s grainy, it may have overheated – try gently warming it over a double boiler while whisking vigorously.
Is this cake suitable for vegetarians? Yes, this recipe is vegetarian. To make it vegan, use plant-based butter and ensure your chocolate doesn’t contain milk solids.
My Personal Touch
What I love most about this recipe is its versatility and reliability. I’ve made it countless times for various occasions – from casual family gatherings to more formal dinner parties – and it never fails to impress.
My favorite variation includes adding a handful of dried cherries and a splash of kirsch to the biscuit mixture, then finishing the cake with a sprinkle of chopped pistachios on top of the ganache for a festive red and green touch. The slight tartness of the cherries perfectly balances the richness of the chocolate.
For those special occasions when I really want to wow my guests, I sometimes make a double batch and create a layer cake, with a thin layer of raspberry jam between the layers and fresh raspberries on top. The combination of the dense, rich chocolate cake with the bright berry flavors is simply divine.
Whether you stick to the classic recipe or experiment with your own variations, this no-bake chocolate biscuit cake is sure to become a staple in your dessert repertoire. It’s the perfect balance of sophistication and comfort, requiring minimal effort but delivering maximum enjoyment. Happy no-baking!