Have you ever stood in front of your open refrigerator at 6 PM, completely exhausted from work, wondering what on earth you’re going to make for dinner? I’ve been there more times than I care to admit. That’s exactly why I created these Cheesy Garlic Chicken Wraps – they’ve genuinely revolutionized my weeknight dinner routine, and I’m confident they’ll do the same for yours.
As a busy parent juggling work, family commitments, and the eternal question of “what’s for dinner?”, I’ve made it my mission to develop recipes that don’t compromise on flavor but respect my limited time and energy. These Cheesy Garlic Chicken Wraps hit all the marks – they’re ready in just 15 minutes, packed with protein, loaded with flavor, and use ingredients that you probably already have in your kitchen right now.
What makes these wraps truly special is the perfect balance of flavors and textures. The warm, melty cheese combined with juicy chicken and that incredible garlic butter creates a wrap that tastes like it came from your favorite restaurant – except you made it yourself in less time than it would take to place a delivery order.
The Perfect Protein-Packed Meal for Busy Weeknights
Before we dive into the recipe, let me tell you why these wraps have earned a permanent spot in my meal rotation. Beyond their incredible flavor, they’re remarkably versatile. You can customize them based on what you have on hand, they’re portable (hello lunch the next day!), and they’re a great way to use up leftover chicken.
I’ve served these wraps to picky eaters, teenagers, and even dinner guests, and they’ve received rave reviews every single time. There’s something universally appealing about warm, cheesy, garlicky goodness wrapped in a toasted tortilla that makes everyone happy.
Let’s get cooking – I promise this will be the easiest, most delicious 15 minutes you’ll spend in the kitchen this week!
Ingredients for Cheesy Garlic Chicken Wraps
For 4 wraps (easily halved or doubled):
- 2 cups cooked chicken, shredded or diced (rotisserie chicken works perfectly)
- 4 large flour tortillas (8-10 inch diameter)
- 2 cups shredded cheese blend (I use a mix of mozzarella and cheddar)
- 4 tablespoons butter
- 4 cloves garlic, minced (about 2 tablespoons)
- 1 teaspoon Italian seasoning
- 1/4 cup fresh parsley, chopped
- 1/2 cup diced tomatoes
- 1/4 cup diced red onion
- 1/2 cup fresh spinach leaves
- Salt and pepper to taste
- Optional: 1/4 cup sour cream or Greek yogurt
- Optional: Hot sauce or crushed red pepper flakes for heat
Kitchen Equipment You’ll Need
Before we start cooking, gather these basic tools:
- Large skillet or griddle
- Small microwave-safe bowl
- Cutting board and knife
- Measuring cups and spoons
- Spatula
Nothing fancy required! That’s part of what makes this recipe so accessible for weeknight cooking.
Step-by-Step Cooking Instructions

1. Prepare the Garlic Butter
Let’s start with the flavor foundation of our wraps – the garlic butter:
- Place 4 tablespoons of butter in a microwave-safe bowl
- Microwave for 20-30 seconds until just melted
- Add the minced garlic, Italian seasoning, and a pinch of salt
- Stir well to combine
- Set aside 1 tablespoon of this mixture for brushing the outside of wraps
The smell of this garlic butter alone will make your kitchen smell like a gourmet restaurant. I sometimes make extra because it’s amazing on everything from bread to vegetables.
2. Prepare Your Wrap Station
Before you start assembling, get all your ingredients lined up for efficiency:
- Have your cooked chicken ready in a bowl
- Place shredded cheese in an easy-to-reach bowl
- Chop all vegetables and have them ready
- Arrange tortillas on a clean surface
- Have your garlic butter within reach
This “mise en place” approach will make the assembly process smooth and efficient – a trick I learned from professional kitchens that changed my home cooking game.
3. Assemble Your Wraps
Now for the fun part – building those flavor-packed wraps:
- Brush one side of each tortilla with a thin layer of garlic butter
- Flip the tortilla so the buttered side is down on your work surface
- Spread 1/2 tablespoon of garlic butter on the inside of each tortilla
- Layer 1/2 cup of chicken in the center of each tortilla
- Sprinkle 1/2 cup of cheese over the chicken
- Add your choice of diced tomatoes, red onion, and spinach
- Season with a pinch of salt and pepper
- Add a dollop of sour cream or Greek yogurt if using
- Sprinkle some fresh parsley
The key here is not to overstuff your wraps. You want them to be generous but still foldable. I’ve learned this lesson the hard way with filling escaping everywhere!
4. Fold and Cook
This technique creates perfectly sealed, crispy wraps:
- Fold the bottom edge of the tortilla up over the filling
- Fold in the sides toward the center
- Roll from the bottom up to create a tight wrap
- Heat a large skillet or griddle over medium heat
- Place wraps seam-side down first to seal them
- Cook for 2-3 minutes until golden brown and crispy
- Flip carefully and cook for another 2 minutes
- Brush the top with the reserved garlic butter while they cook
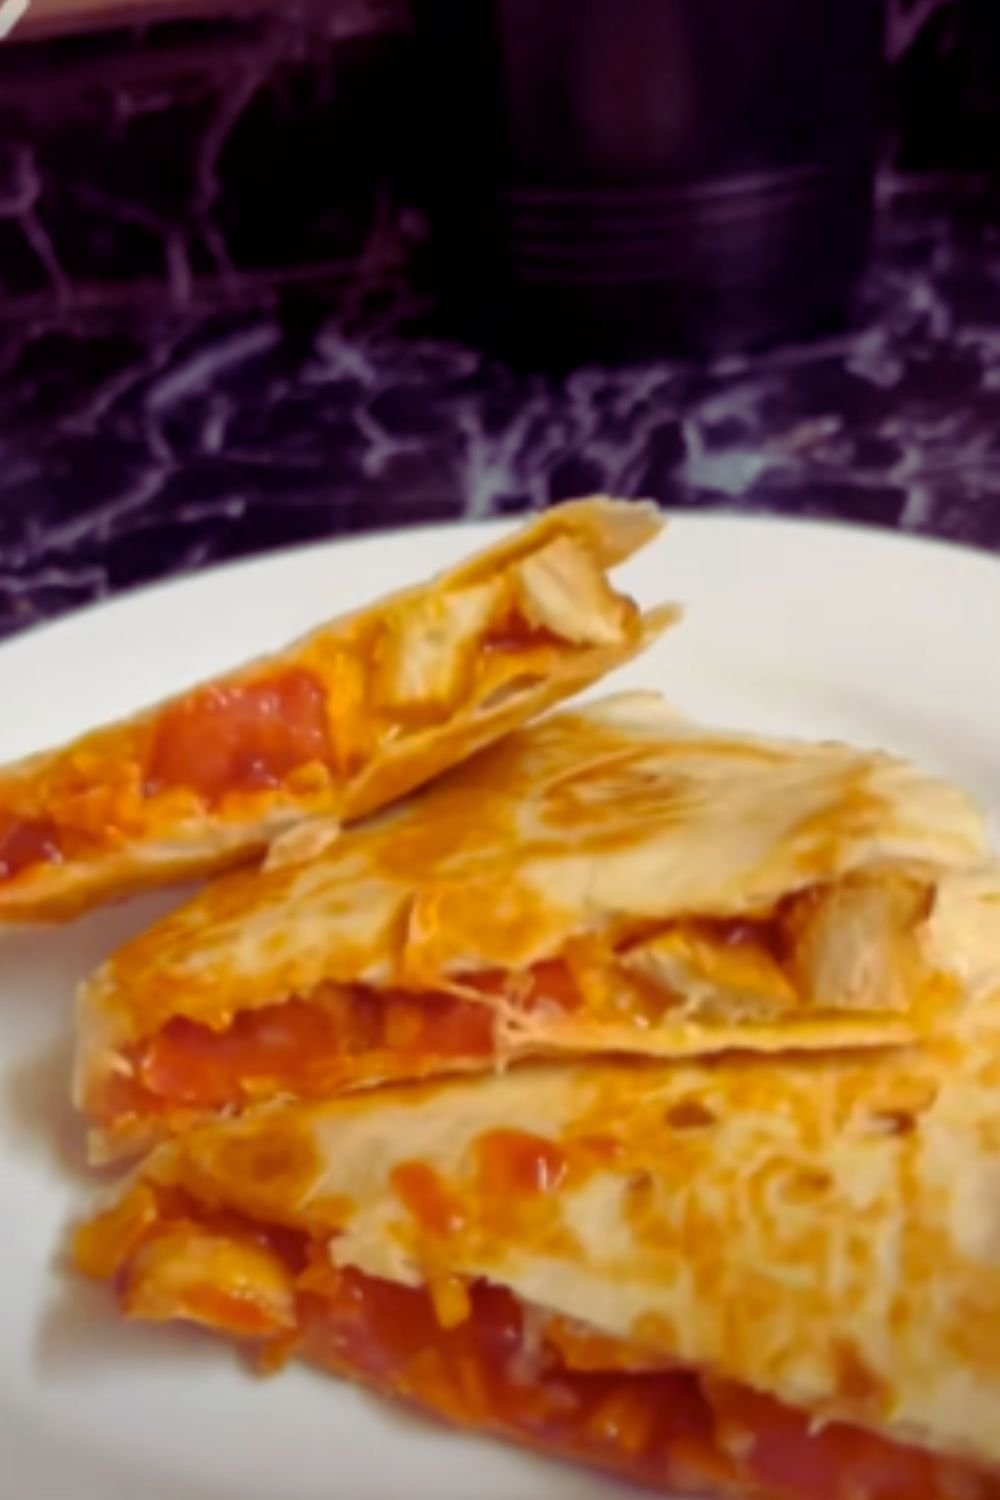
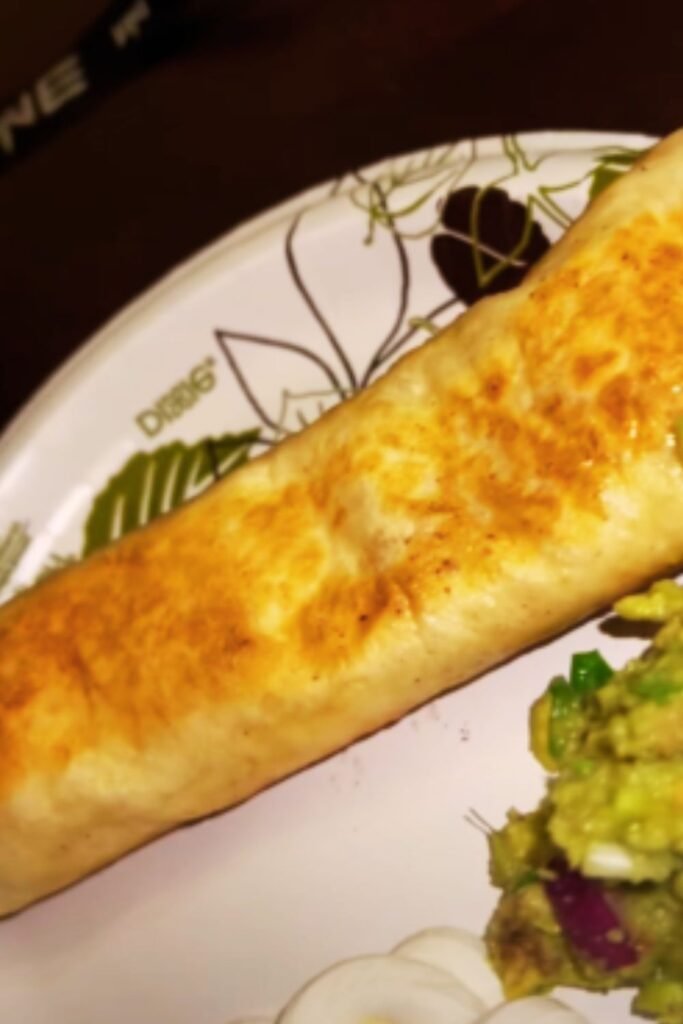
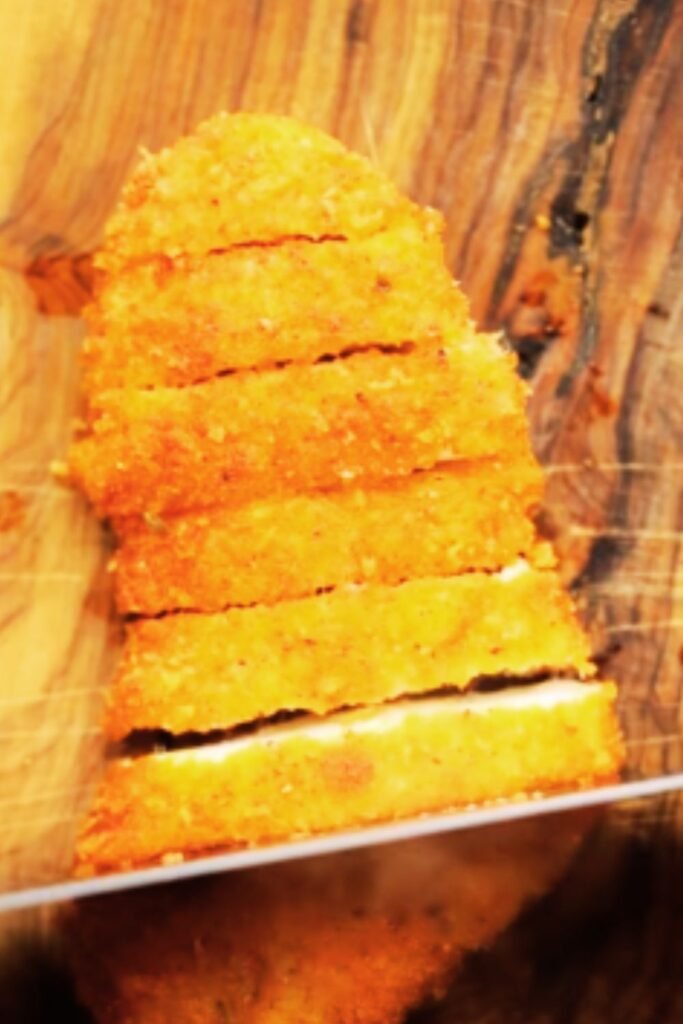
You’ll know they’re perfect when the tortilla is golden and crispy, and the cheese inside has melted to gooey perfection. That contrast between the crisp exterior and the melty interior is what makes these wraps irresistible.
5. Serve and Enjoy
These are best enjoyed immediately while still hot and crispy:
- Cut each wrap diagonally for an attractive presentation
- Serve with a side of marinara sauce or ranch dressing for dipping
- Garnish with extra fresh parsley
- Add a side salad or some crispy potatoes to complete the meal
Nutritional Information
Here’s the approximate nutritional breakdown per wrap (without optional ingredients):
| Nutrient | Amount | % Daily Value* |
|---|---|---|
| Calories | 480 | – |
| Total Fat | 28g | 36% |
| Saturated Fat | 15g | 75% |
| Cholesterol | 115mg | 38% |
| Sodium | 620mg | 27% |
| Total Carbohydrate | 31g | 11% |
| Dietary Fiber | 2g | 7% |
| Sugars | 2g | – |
| Protein | 29g | 58% |
| Calcium | 350mg | 27% |
| Iron | 2.5mg | 14% |
| Potassium | 320mg | 7% |
*Percent Daily Values are based on a 2,000 calorie diet
Delicious Variations to Try
One of the reasons I love this recipe is its versatility. Here are some of my favorite variations that have been hits with my family:
Mediterranean Style
- Add diced cucumber, kalamata olives, and feta cheese
- Use Greek yogurt instead of sour cream
- Add a sprinkle of oregano to the garlic butter
Buffalo Chicken
- Toss the chicken in buffalo sauce before adding to wraps
- Use blue cheese instead of (or in addition to) the cheese blend
- Add celery and carrot slivers for crunch
- Serve with blue cheese dressing for dipping
Bacon Ranch
- Add 2 strips of cooked, crumbled bacon to each wrap
- Mix 1 tablespoon ranch seasoning into the garlic butter
- Add avocado slices for creaminess
Vegetarian Option
- Replace chicken with 1 cup of sautéed mushrooms and bell peppers
- Add 1/4 cup black beans for protein
- Use pepper jack cheese for a spicy kick
Mexican Inspired
- Replace Italian seasoning with taco seasoning
- Add black beans and corn
- Use pepper jack cheese
- Serve with salsa and guacamole
Make-Ahead and Storage Tips
While these wraps are quick to make, you can prep even further ahead:
Meal Prep Components
You can prepare several elements ahead of time:
- Cook chicken in bulk and store in the refrigerator (lasts 3-4 days)
- Pre-chop vegetables and store in airtight containers
- Make garlic butter and store in the refrigerator (bring to room temperature before using)
Storing Leftovers
If you happen to have any leftovers (which rarely happens in my house!):
- Wrap tightly in aluminum foil
- Store in the refrigerator for up to 2 days
- Reheat in a 350°F oven for 10-15 minutes until heated through
- Alternatively, reheat in a skillet over medium heat for 2-3 minutes per side
Freezing Option
These wraps can be frozen before cooking:
- Assemble wraps as directed, but don’t cook them
- Wrap each one tightly in plastic wrap, then aluminum foil
- Freeze for up to 1 month
- To cook from frozen: unwrap, place in a cold skillet, cover, and cook over medium-low heat for 15-20 minutes, flipping halfway through
Serving Suggestions
Turn these wraps into a complete meal with these simple sides:
Quick Side Dishes
- Simple green salad with lemon vinaigrette
- Roasted vegetables (whatever’s in season)
- Tomato soup for dipping
- Sweet potato fries
- Fresh fruit salad
- Cucumber and tomato salad with a simple vinaigrette
Beverage Pairings
- Sparkling water with lemon or lime
- Iced tea with mint
- Homemade lemonade
- Fruit smoothies
- Kombucha
For a Party Spread
When I’m entertaining, I sometimes make mini versions of these wraps:
- Use small tortillas and cut each wrap into pinwheels
- Provide a variety of dipping sauces
- Serve alongside a vegetable platter and hummus
- Add a fruit platter for a complete buffet
Why This Recipe Works: The Science Behind the Deliciousness
As someone fascinated by food science, I love understanding why certain recipes work so well. Here’s what makes these wraps foolproof:
The Perfect Cheese Melt
The combination of direct heat and the moisture from the other ingredients creates the perfect environment for melting cheese without burning the tortilla. Using a cheese blend rather than a single type creates better melting properties and a more complex flavor.
The Garlic Butter Magic
Butter has a low smoke point, but by combining it with the garlic and applying it to the tortilla rather than directly to the hot pan, you get all the flavor without burning. The fat in the butter also helps create that perfect crispy exterior while adding rich flavor.
Protein + Carbs + Vegetables = Satisfaction
The combination of protein from the chicken, carbohydrates from the tortilla, and fiber from the vegetables creates a nutritionally balanced meal that keeps you satisfied longer. The fat from the cheese and butter adds richness that makes the wrap feel indulgent despite being quick and simple.
Common Mistakes to Avoid
In my many iterations of this recipe, I’ve made plenty of mistakes so you don’t have to:
Overstuffing the Wrap
It’s tempting to add more of everything, but this leads to wraps that won’t stay closed and fillings that spill out. Stick to the recommended amounts for best results.
Heat Too High
Medium heat is perfect for these wraps. Too high and the tortilla will burn before the cheese melts; too low and you won’t get that desirable crispy exterior.
Not Sealing the Wrap Properly
Make sure to fold and roll tightly, and always place the wrap seam-side down first to seal it closed during cooking.
Using Wet Ingredients Without Draining
If using tomatoes or other watery vegetables, give them a quick drain on paper towels first to prevent soggy wraps.
Rushing the Process
Even though this is a quick recipe, each step matters. Don’t rush the cooking time or the wraps won’t get properly crispy and the cheese won’t fully melt.
FAQ: Your Questions Answered

Q: Can I use corn tortillas instead of flour tortillas?
A: While flour tortillas are more pliable and better for this recipe, you can use corn tortillas if you prefer or need a gluten-free option. Just warm them slightly first to prevent cracking when you fold them.
Q: What’s the best way to cook chicken for this recipe if I don’t have rotisserie chicken?
A: My favorite quick method is to season chicken breasts with salt and pepper, then cook them in a skillet over medium heat for about 5-7 minutes per side until they reach 165°F internal temperature. Let them rest for 5 minutes before dicing or shredding.
Q: Can I make these dairy-free?
A: Yes! Use plant-based butter and your favorite dairy-free cheese alternative. Just be aware that plant-based cheeses melt differently than dairy cheese, so you may need to adjust cooking time.
Q: My kids don’t like vegetables. Can I still make these?
A: Absolutely. Start with just the chicken and cheese, then gradually introduce vegetables in small amounts. Finely chopped spinach mixed with the cheese is often undetectable but adds nutrition.
Q: How do I prevent the wraps from getting soggy?
A: Make sure any wet ingredients (like tomatoes) are well-drained. Also, don’t let assembled wraps sit too long before cooking them.
Q: Can I use leftover turkey instead of chicken?
A: Yes! Leftover turkey works beautifully in this recipe. It’s actually one of my favorite ways to use Thanksgiving leftovers.
Q: What if I don’t have fresh garlic?
A: Garlic powder works in a pinch. Use about 1/2 teaspoon in place of each clove of fresh garlic.
Q: Can I make these spicy?
A: Absolutely! Add a pinch of crushed red pepper to the garlic butter, use pepper jack cheese, or add sliced jalapeños to the filling.
Q: My tortillas keep breaking when I fold them. What am I doing wrong?
A: Cold tortillas tend to crack. Try warming them for 10-15 seconds in the microwave or briefly in a dry skillet before assembling.
Q: Can I use a panini press instead of a skillet?
A: Yes! A panini press works wonderfully and cooks both sides at once. Just be careful not to press too hard or the filling might squeeze out.
Personal Cooking Notes
I believe what sets home cooking apart is the personal touches we add to recipes. Here are some notes from my experience making these wraps countless times:
I find that slightly warming the tortillas before assembling makes them more pliable and less likely to tear. Just 10 seconds in the microwave does the trick.
When it comes to the chicken, I often cook extra chicken breasts or thighs earlier in the week specifically to have leftovers for these wraps. The flavor is actually better when the chicken has been refrigerated overnight.
Don’t rush the browning process. Those extra 30 seconds of patience can be the difference between a good wrap and a great one.
If you’re cooking for a family, you can assemble all the wraps before starting to cook any of them. Then cook them in batches, keeping the cooked ones warm in a 200°F oven while you finish the rest.
I’ve found that the order of ingredients matters: putting cheese directly next to the chicken helps it melt better, while putting vegetables in the center keeps them from making the tortilla soggy.
Final Thoughts: Why These Wraps Changed My Weeknight Dinner Game
I developed this recipe during a particularly chaotic season of life when I was working long hours and still wanted to put a home-cooked meal on the table. What started as a desperate attempt to use leftovers has become one of our family’s favorite meals.
What I love most about these wraps isn’t just their delicious flavor – it’s how they’ve simplified my life. They’ve become our go-to solution for:
- Busy weeknights when we’re running between activities
- Using up leftover chicken that might otherwise go to waste
- Quick lunches that feel more special than a sandwich
- Easy meals that older kids can help prepare or make independently
I hope these Cheesy Garlic Chicken Wraps bring the same joy and simplicity to your kitchen that they’ve brought to mine. Remember, good food doesn’t have to be complicated or time-consuming – sometimes the simplest recipes become the ones we return to again and again.
Happy cooking!