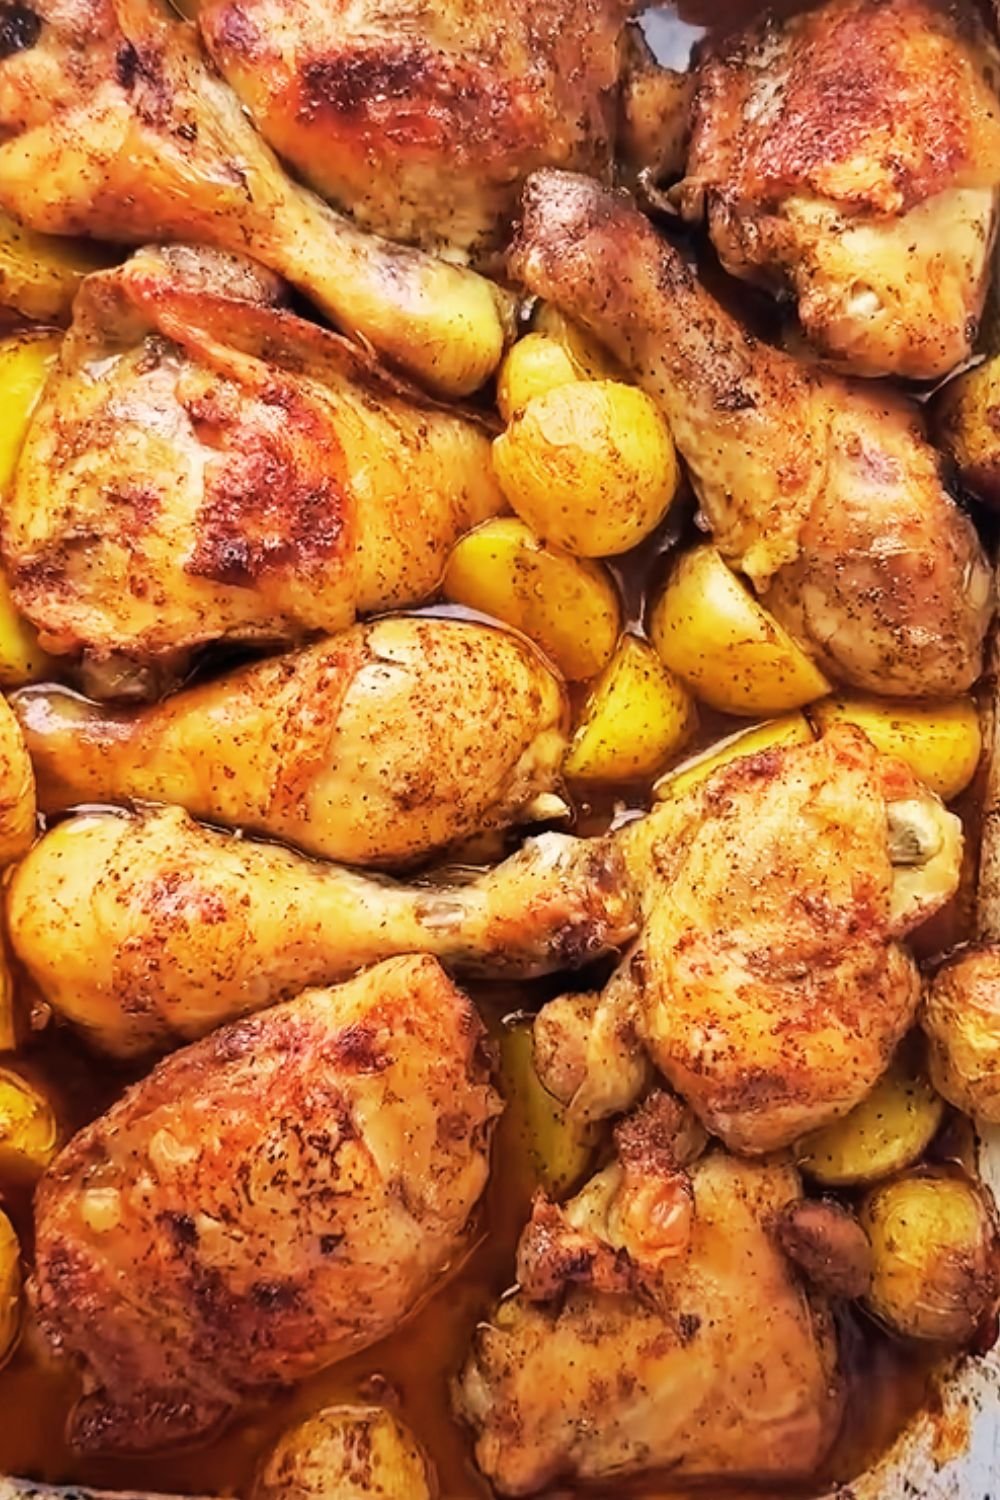
There’s something incredibly comforting about a perfectly braised chicken dish, especially when it’s served with creamy potatoes and a silky chive butter sauce. I’ve been perfecting this recipe for years, and it’s become one of my most requested dinner party dishes. The combination of tender, fall-off-the-bone chicken and buttery potatoes swimming in a rich sauce is simply unbeatable when you’re craving comfort food with a touch of elegance.
The Magic of Braising
I remember the first time I attempted this braising technique in my tiny apartment kitchen. The transformation of humble ingredients into something extraordinary left me stunned. Braising is truly magical—it’s that perfect middle ground between roasting and stewing that yields unparalleled tenderness and flavor depth.
Braising involves cooking food (usually meat) with a small amount of liquid in a covered pot at a low temperature for an extended period. This technique breaks down tough connective tissues in meat, resulting in that melt-in-your-mouth texture we all crave. For this particular recipe, we’ll be using chicken thighs, which are perfect for braising due to their higher fat content and connective tissue.
Ingredients You’ll Need
For the braised chicken:
- 8 bone-in, skin-on chicken thighs (about 3 pounds)
- 2 tablespoons olive oil
- 2 tablespoons unsalted butter
- 2 medium yellow onions, diced
- 4 cloves garlic, minced
- 2 carrots, diced
- 2 celery stalks, diced
- 2 tablespoons all-purpose flour
- 1 cup dry white wine (such as Sauvignon Blanc)
- 2 cups chicken stock
- 2 bay leaves
- 4 sprigs fresh thyme
- 2 teaspoons fresh rosemary, chopped
- 1½ pounds baby potatoes (preferably a mix of red and gold)
- Salt and freshly ground black pepper, to taste
For the chive butter sauce:
- 6 tablespoons unsalted butter, softened
- ¼ cup fresh chives, finely chopped
- 1 tablespoon fresh lemon juice
- 1 teaspoon lemon zest
- 1 small garlic clove, grated
- ¼ teaspoon salt
- Pinch of white pepper
Essential Equipment
- Large Dutch oven or heavy-bottomed pot with lid
- Sharp chef’s knife and cutting board
- Measuring cups and spoons
- Wooden spoon
- Small mixing bowl
- Kitchen twine (for herb bundle)
- Instant-read thermometer
- Slotted spoon
- Small saucepan
Preparing the Chicken
The key to exceptional braised chicken begins with proper preparation and searing. Follow these steps for the best results:
- Pat the chicken thighs dry with paper towels. This is crucial for achieving a good sear.
- Season generously with salt and pepper on both sides. I like to do this at least 30 minutes before cooking, allowing the seasoning to penetrate the meat.
- Heat olive oil in your Dutch oven over medium-high heat until shimmering.
- Working in batches (don’t overcrowd!), place the chicken skin-side down and sear until golden brown, about 5-6 minutes.
- Flip and sear the other side for another 3-4 minutes.
- Transfer the seared chicken to a plate and set aside.
Building Flavor: The Aromatics
The foundation of any good braise is the aromatic base. Here’s how I build those complex flavors:
- In the same Dutch oven with the chicken drippings, add the butter and melt over medium heat.
- Add the diced onions with a pinch of salt and cook until softened and translucent, about 5 minutes.
- Add the garlic and cook until fragrant, about 30 seconds.
- Add the diced carrots and celery, cooking until they begin to soften, about 5-7 minutes.
- Sprinkle the flour over the vegetables and stir continuously for 2 minutes to cook out the raw flour taste.
- Pour in the white wine, scraping the bottom of the pot to release all those flavorful browned bits (this is called deglazing).
- Allow the wine to simmer and reduce by half, about 3-4 minutes.
The Braising Process
Now comes the heart of the recipe—the slow, gentle braising that transforms everything into tender deliciousness:
- Add the chicken stock, bay leaves, thyme sprigs, and rosemary to the pot.
- Return the seared chicken to the pot, skin-side up, nestling the pieces into the liquid without fully submerging them (the skin should remain above the liquid).
- Bring the liquid to a gentle simmer, then reduce heat to low.
- Cover the Dutch oven and cook for 25 minutes.
- Add the baby potatoes, tucking them into the braising liquid around the chicken.
- Continue cooking, covered, for another 30-35 minutes, or until the chicken is completely tender and the potatoes can be easily pierced with a fork.
- The internal temperature of the chicken should reach at least 175°F (80°C) for thighs to be tender.
Chive Butter Sauce: The Crowning Glory
While the chicken and potatoes are finishing their braising time, prepare the chive butter sauce that will elevate this dish from great to extraordinary:
- In a small bowl, combine the softened butter, chopped chives, lemon juice, lemon zest, grated garlic, salt, and white pepper.
- Mix thoroughly until all ingredients are well incorporated.
- Set aside at room temperature until ready to use, or refrigerate if making ahead (just be sure to bring back to room temperature before serving).
Finishing Touches
The final steps bring everything together for a restaurant-quality presentation:
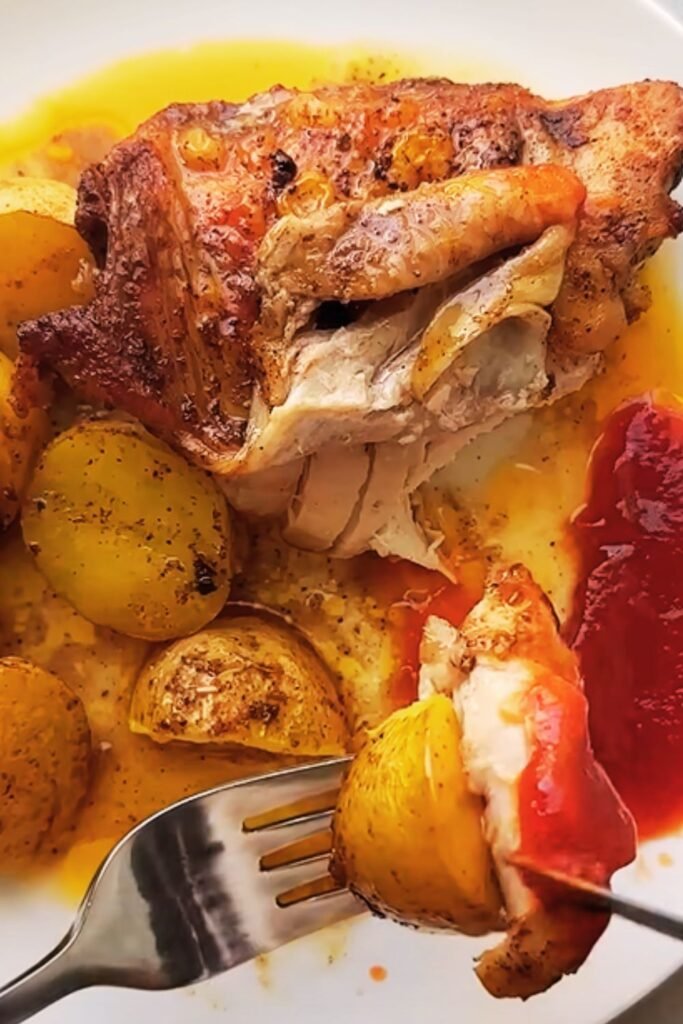
- Once the chicken and potatoes are fully cooked, carefully remove them from the braising liquid using a slotted spoon and arrange on a serving platter. Cover loosely with foil to keep warm.
- Strain the braising liquid through a fine-mesh sieve into a small saucepan, pressing on the vegetables to extract maximum flavor.
- Simmer the strained liquid over medium heat until reduced by about one-third, creating a more concentrated sauce (about 5-7 minutes).
- Remove from heat and whisk in half of the chive butter mixture until fully incorporated and smooth.
- Pour some of the sauce over the chicken and potatoes, reserving the rest for serving at the table.
- Dot the remaining chive butter over the hot chicken and potatoes, allowing it to melt and create pockets of herb-infused richness.
- Garnish with additional fresh chives.
Tips for Perfect Braised Chicken
Drawing from my years of making this dish, here are some tips to ensure your braised chicken is always spectacular:
- Choose the right chicken: Thighs are ideal for braising as they stay moist and tender. If you prefer white meat, bone-in, skin-on breasts will work, but reduce the braising time to prevent them from drying out.
- Don’t rush the sear: A proper sear creates the foundation for flavor development. Be patient and get that skin golden brown.
- Control your liquid: The chicken should not be fully submerged—this is braising, not poaching. Aim for the liquid to come about halfway up the sides of the chicken pieces.
- Gentle heat: Maintain a very gentle simmer throughout the braising process. Aggressive boiling will toughen the meat.
- Let it rest: Allow the finished dish to rest for 10 minutes before serving to let the flavors settle and the sauce to be reabsorbed slightly.
Nutritional Information
Here’s a detailed breakdown of what you can expect from this meal nutritionally. Note that values are approximate and may vary based on specific ingredients and portions:
| Nutrient | Amount per Serving | % Daily Value* |
|---|---|---|
| Calories | 520 | – |
| Total Fat | 32g | 41% |
| Saturated Fat | 12g | 60% |
| Cholesterol | 185mg | 62% |
| Sodium | 780mg | 34% |
| Total Carbohydrate | 22g | 8% |
| Dietary Fiber | 3g | 11% |
| Sugars | 4g | – |
| Protein | 38g | 76% |
| Vitamin A | 3500IU | 70% |
| Vitamin C | 15mg | 17% |
| Calcium | 40mg | 4% |
| Iron | 2.5mg | 14% |
*Percent Daily Values are based on a 2,000 calorie diet. Your daily values may be higher or lower depending on your calorie needs.
Serving Suggestions
I’ve found that this hearty dish pairs beautifully with:
- A crisp green salad with a light vinaigrette to cut through the richness
- Steamed green vegetables like broccolini or green beans with lemon
- Crusty artisan bread for soaking up the sauce
- Roasted root vegetables for an extra hearty meal
- A side of cranberry sauce or lingonberry preserves for a sweet-tart contrast
For a complete family-style meal, I like to serve this dish in the center of the table with sides arranged around it, allowing everyone to help themselves. The presentation is rustic yet elegant, perfect for both casual family dinners and entertaining guests.

Make-Ahead and Storage Tips
One of the best things about this braised chicken recipe is that it actually improves with time, making it perfect for meal prep or entertaining:
- Make ahead: Prepare the entire dish up to 2 days ahead, cool completely, and refrigerate. Reheat gently in a 325°F (165°C) oven until warmed through, about 25-30 minutes.
- Freezing: After cooling completely, freeze in an airtight container for up to 3 months. Thaw overnight in the refrigerator before reheating.
- Storage: Leftovers will keep in the refrigerator for 3-4 days in an airtight container.
- Reheating: For best results when reheating, add a splash of chicken stock to maintain moisture.
- Chive butter: The butter can be made up to 1 week ahead and refrigerated, or frozen for up to 1 month. Bring to room temperature before using.
Seasonal Variations
I love adapting this recipe throughout the year to incorporate seasonal ingredients:
Spring
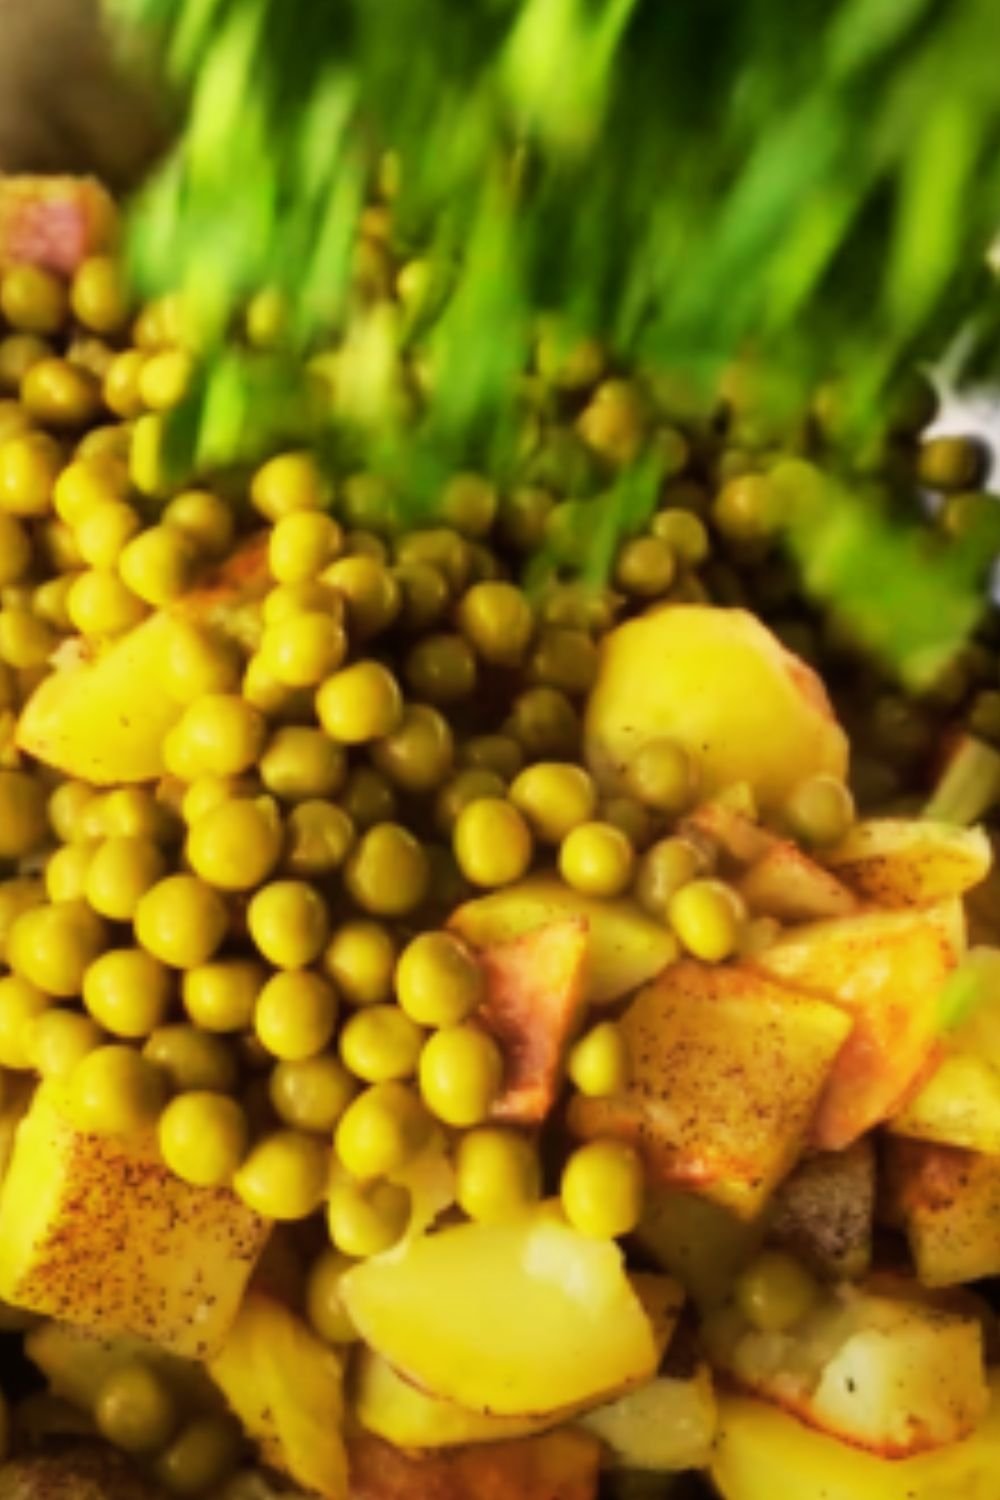
- Add fresh peas and asparagus during the last 5 minutes of cooking
- Use more spring herbs like tarragon and chervil in the butter sauce
Summer
- Substitute new potatoes and add cherry tomatoes
- Incorporate fresh corn kernels and basil
Fall
- Add mushrooms to the aromatic base
- Include diced butternut squash with the potatoes
- Use sage in addition to the other herbs
Winter
- Add parsnips and turnips with the potatoes
- Incorporate a bit of orange zest in the chive butter
- Consider adding dried cranberries for a festive touch
Questions & Answers
What’s the difference between braising and stewing? Braising typically involves larger pieces of meat partially submerged in liquid, while stewing uses smaller pieces completely covered in liquid. With braising, we’re looking to keep that delicious skin above the liquid so it remains somewhat crisp, while the meat below tenderizes in the braising liquid.
Can I use boneless, skinless chicken thighs instead? Yes, but you’ll lose some flavor and texture. If using boneless skinless thighs, reduce the overall cooking time by about 15 minutes. The bones add flavor and the skin adds both flavor and helps keep the meat moist.
What can I substitute for white wine? If you prefer not to use wine, substitute with additional chicken stock plus 1 tablespoon of white wine vinegar or lemon juice to add acidity. You could also use vermouth or even a light-bodied apple cider.
Can I make this in a slow cooker? Absolutely! Sear the chicken and build the aromatics as directed, then transfer everything to a slow cooker. Cook on low for 5-6 hours or high for 3-4 hours. Add the potatoes during the last 1-2 hours of cooking. You may want to reduce the sauce on the stovetop afterward for a more concentrated flavor.
How do I prevent the chicken skin from becoming soggy? Make sure the skin remains above the braising liquid during cooking. If you want extra-crispy skin after braising, you can place the chicken under the broiler for 2-3 minutes before serving.
What herbs can I substitute if I don’t have fresh ones? Dried herbs can work, but use about one-third the amount called for fresh. For the chive butter, however, fresh herbs are strongly recommended as dried herbs won’t provide the same bright flavor.
Can I make this spicy? Absolutely! Add a diced jalapeño with the aromatics or include a pinch of red pepper flakes. For a different flavor profile, add a tablespoon of harissa paste when building the base flavors.
Is this recipe gluten-free? Not as written, but it’s easy to adapt. Simply substitute the all-purpose flour with a gluten-free flour blend or use 1 tablespoon of cornstarch mixed with a little cold water as a slurry to thicken the sauce toward the end of cooking.
Final Thoughts
My braised chicken with potatoes and chive butter sauce has evolved over the years, with each subtle change bringing it closer to perfection. What makes this dish special isn’t just the techniques or ingredients—it’s how it brings people together. There’s something about presenting a beautiful Dutch oven filled with golden chicken and potatoes at the center of the table that creates an immediate sense of comfort and connection.
I encourage you to make this recipe your own. Perhaps add your family’s favorite herb to the butter sauce or incorporate a vegetable that holds special meaning for you. Cooking should be personal, and the best recipes are those that tell our own stories.
This dish has become my signature offering when comfort is needed—whether for celebrating good news, consoling during difficult times, or simply bringing warmth to a cold evening. I hope it becomes a cherished recipe in your collection as well.